You can read every textbook chapter on Windows Server administration, but nothing builds real confidence like staring at a PowerShell prompt and getting it to work yourself. Whether you’re sitting the CompTIA A+, Network+, or Server+ exam — or transitioning into a sysadmin or cloud engineering role — these are the exact labs that separate technicians who know the theory from those who actually manage enterprise infrastructure daily. Estimated reading time: 30 minutes.
What You’ll Learn:
- Create and secure SMB network shares via File Explorer, Server Manager GUI, and PowerShell
- Understand ACLs (Access Control Lists), share permissions vs. NTFS permissions, and the “most restrictive wins” rule
- Enable RDP on local and remote servers using three distinct methods
- Configure and test PowerShell remote management (WinRM) across multiple servers
- Manage Windows Update settings and active hours on Windows Server 2019/2022/2025
- Extend a Windows Server evaluation period using
slmgr /rearm - Reset the DSRM (Directory Services Restore Mode) password using
ntdsutil
Prerequisites & Lab Environment
What you need:
- Windows Server 2019, 2022, or 2025 (evaluation ISO from Microsoft — free)
- Minimum two VMs:
DC1(Domain Controller) and a second server (File Server or Server Core) - VirtualBox or Hyper-V (both free)
- A Windows 10/11 client VM joined to the domain
- All VMs on the same internal/Host-Only network
Download Resources:
- Windows Server 2025 Evaluation: microsoft.com/en-us/evalcenter
- VirtualBox: virtualbox.org
💡 Tip: Before each lab, snapshot your VM in VirtualBox or Hyper-V. Snapshots let you roll back mistakes without reinstalling — an essential habit in real production environments.
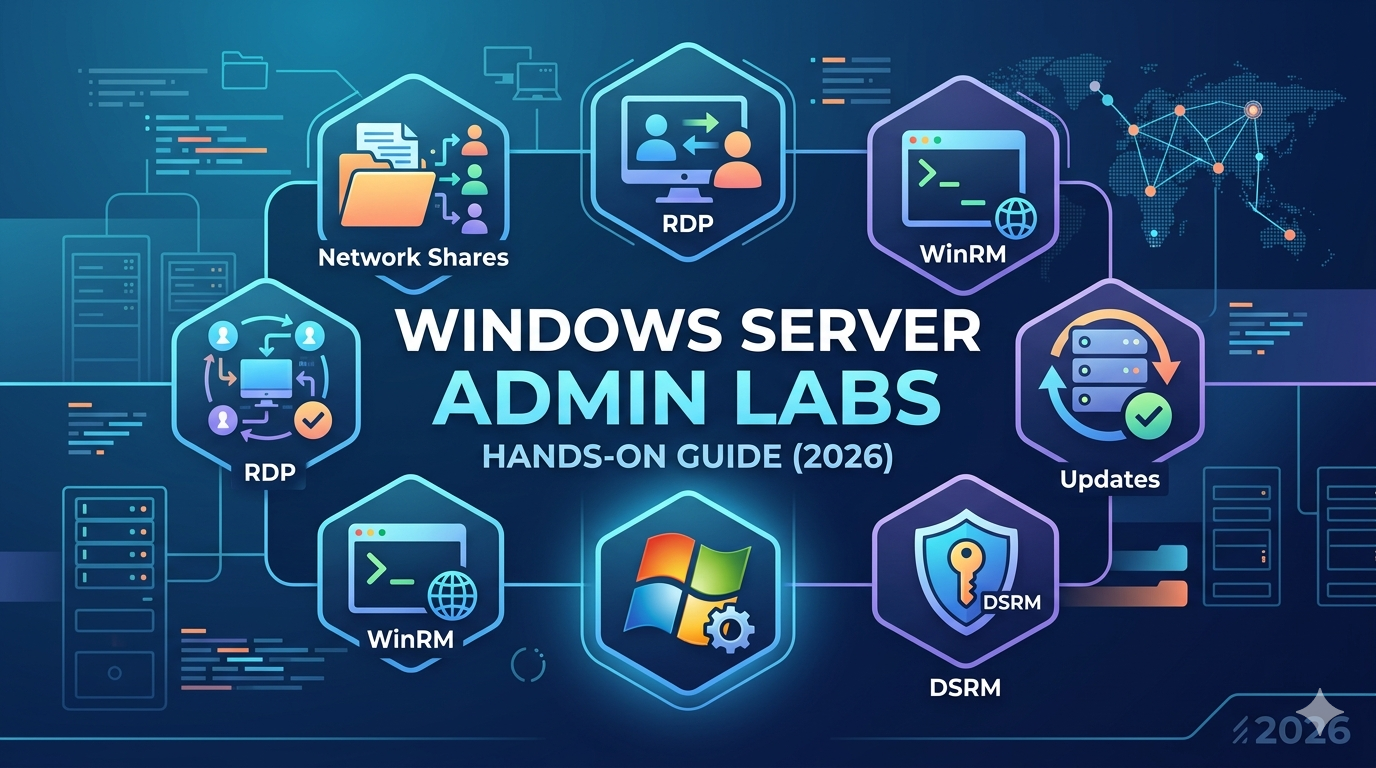
Lab Overview: Your 7 Tasks
Attempt each task on your own first before reading the guided steps below. Real-world IT environments don’t come with instructions — developing the instinct to explore consoles and troubleshoot independently is the core skill these labs build.
| Task | Objective | Tools Used |
|---|---|---|
| Task 1 | Create a network share via File Explorer | File Explorer, folder Properties |
| Task 2 | Create a share via Server Manager (SMB Advanced) | Server Manager → File & Storage Services |
| Task 3 | Enable RDP using three methods | CMD, PowerShell, Server Manager |
| Task 4 | Enable PowerShell Remote Management (WinRM) | PowerShell, Enable-PSRemoting |
| Task 5 | Configure Windows Update settings | Settings → Update & Security |
| Task 6 | Extend the evaluation period | PowerShell, slmgr /rearm |
| Task 7 | Reset the DSRM password | ntdsutil |
Task 1 — Create a Network Share via File Explorer
🎯 Your Challenge
Create a folder called AdminShare at the root of your C: drive on your File Server. Share it exclusively with the Administrators group using the folder Properties dialog. Verify the share is accessible from DC1 using \\FileServer.
📋 Step-by-Step Instructions
Step 1: Open File Explorer and Check Existing Shares
Before creating anything, see what’s currently shared:
File Explorer address bar → type: \\localhost → press Enter
If nothing is shared yet, the window appears empty. This is your clean starting state.
Step 2: Create the Folder
Open File Explorer → This PC → C: drive
Right-click blank area → New → Folder
Name it: AdminShare
💡 Real-World Context: An Admin Share is a common sysadmin pattern — a central network location where IT staff deposit tools, software packages, ISO images, scripts, and firmware for remote deployment across all domain-joined machines. Only the Administrators group should have access.
Step 3: Open Folder Properties
Right-click AdminShare → Properties
You’ll see two critical tabs:
- Sharing tab — controls who can see and connect to the share over the network
- Security tab — controls NTFS file system permissions for local and network access
- Both tabs work together — you must configure both
Step 4: Configure the Sharing Tab
Properties → Sharing tab → Click "Share..."
In the sharing dialog:
- Click the dropdown → Select or type
Administrators - Set permission level: Read/Write
- Click Share
- Click Done
Step 5: Verify the ACL on the Security Tab
Properties → Security tab
Confirm that only the Administrators group appears in the access control list (ACL). If Everyone is present, click Edit → select Everyone → click Remove → Apply → OK.
🔐 2026 Security Note: SMB signing is now required by default on all outbound connections in Windows Server 2025 and Windows 11 24H2. This means all SMB traffic is automatically authenticated and integrity-checked — a significant security improvement over previous server versions where signing was only enforced for specific shares like
SYSVOLandNETLOGON.
Step 6: Verify the Share is Accessible from DC1
On your DC1 machine:
Press Win+R → type: \\FileServer → press Enter
You should see AdminShare appear. If your username belongs to the Administrators group, you’ll access it without any prompt.
PowerShell Alternative — Create and Verify Share:
# Create folder
New-Item C:\AdminShare -ItemType Directory
# Create SMB share with Admin-only access
New-SmbShare -Name "AdminShare" -Path "C:\AdminShare" `
-FullAccess "Administrators"
# Set NTFS permissions (Administrators = Full Control)
icacls "C:\AdminShare" /grant "Administrators:(OI)(CI)(F)"
# Verify share exists
Get-SmbShare -Name "AdminShare" | Format-List Name, Path, SecurityDescriptor
# Test access from same machine
Invoke-Command -ComputerName FileServer -ScriptBlock {
Get-ChildItem \\FileServer\AdminShare
}
# Remove share when done (folder remains)
Remove-SmbShare -Name "AdminShare" -Force
Expected Output:
Name               : AdminShare
Path               : C:\AdminShare
SecurityDescriptor : O:SYG:SYD:(A;;FA;;;BA)
Task 2 — Create an SMB Share via Server Manager (Advanced Method)
🎯 Your Challenge
Using Server Manager → File and Storage Services, create a new share called Data at a custom path. Apply Access-Based Enumeration, restrict access to Domain Users only with Modify permissions, and understand why the most restrictive permission (share vs. NTFS) always wins.
📋 Step-by-Step Instructions
Step 1: Open Server Manager → File and Storage Services
Server Manager → left menu: File and Storage Services → Shares
Step 2: Create a New Share
Tasks → New Share...
Step 3: Select Share Type
On the Select Profile screen, choose SMB Share – Quick for standard shares. For more control over shadow copies, quotas, and advanced security, choose SMB Share – Advanced.
Click Next.
💡 SMB Share Types Explained:
- SMB Share – Quick: Standard file share with basic permissions; fastest to set up
- SMB Share – Advanced: Full control over access-based enumeration, caching, encryption, and folder management properties
- SMB Share – NFS: For Linux/Unix clients (not Windows)
Step 4: Select a Volume and Custom Path
- Select Type a custom path radio button
- Click Browse
- Expand your C: drive
- Click New Folder → name it
Data - Click Select Folder
The wizard confirms:
- Network path:
\\FileServer\Data← remote access path - Local path:
C:\Data← local machine path
Click Next.
Step 5: Configure Share Name and Settings
- Share name:
Data - Description: (optional) “Shared data folder for domain users”
On the Other Settings screen, configure:
| Setting | Recommendation | Why |
|---|---|---|
| Enable access-based enumeration | ✅ Enable | Users only see folders they have permission to access |
| Allow caching of share | ✅ Enable | Users can work with share content offline |
| Encrypt data access | ✅ Enable in 2026 | SMB encryption protects data in transit |
| Require encryption | ✅ for sensitive shares | Prevents unencrypted client connections |
Click Next.
Step 6: Customize Permissions — The Critical Step
Click Customize permissions on the Permissions page.
This is the same Security tab you saw in File Explorer, but integrated into the wizard.
Remove “Everyone” from Share Permissions:
Permissions tab → Highlight "Everyone" → Remove
Add Domain Users to Share Permissions (Full Control):
Click Add → type: Domain Users → Check Names → OK
Permission level: Full Control → OK
Add Domain Users to NTFS Permissions (Modify only):
Click Add again → type: Domain Users → Check Names → OK
Permission level: Modify → OK
⚠️ The Most Restrictive Permission Rule: When a user accesses a share over the network, Windows applies both the Share permission AND the NTFS permission — and enforces whichever is more restrictive. In this example:
- Share permission: Full Control
- NTFS permission: Modify
- Effective permission: Modify (the more restrictive one)
If the user logs in locally (physically on the machine), only NTFS permissions apply — Share permissions don’t matter for local access.
The Restrictive Permission Matrix:
| Share Permission | NTFS Permission | Network Access | Local Access |
|---|---|---|---|
| Full Control | Modify | Modify (NTFS wins) | Modify |
| Read | Full Control | Read (Share wins) | Full Control |
| Full Control | Read | Read (NTFS wins) | Read |
| Modify | Write | Write (NTFS wins) | Write |
Click OK → Next → Create.
Step 7: Verify via PowerShell:
# Verify share exists and check properties
Get-SmbShare -Name "Data" | Format-List *
# Check share permissions
Get-SmbShareAccess -Name "Data"
# Check NTFS permissions
(Get-Acl "C:\Data").Access |
Select IdentityReference, FileSystemRights, AccessControlType
# Test that access-based enumeration is enabled
Get-SmbShare -Name "Data" | Select Name, FolderEnumerationMode
# Expected: FolderEnumerationMode = AccessBased
Task 3 — Enable RDP Using Three Methods
🎯 Your Challenge
Enable Remote Desktop Protocol on your DC1 using all three methods: the GUI/CMD dialog, PowerShell commands, and Server Manager remote PowerShell. Then test connectivity from your Windows 10/11 client VM.
📋 Step-by-Step Instructions
Method A: System Properties Dialog (CMD/GUI)
Step 1: Open System Properties Remote Tab
Press Win+R → type: SystemPropertiesRemote.exe → Enter
This opens the Remote tab of System Properties directly.
Step 2: Enable RDP
- Under Remote Desktop: select “Allow remote connections to this computer”
- Leave “Allow connections only from computers running Remote Desktop with Network Level Authentication” checked for security
- Click Select Users… → Add authorized users (e.g.,
Internsgroup) → Click Check Names → OK - Click Apply → OK
Method B: PowerShell Commands (Recommended for Automation)
Run PowerShell as Administrator:
# ─── Command 1: Enable RDP in Registry ───────────────────
Set-ItemProperty -Path 'HKLM:\System\CurrentControlSet\Control\Terminal Server' `
-Name "fDenyTSConnections" -Value 0
# Value 0 = RDP enabled | Value 1 = RDP disabled [web:188]
# ─── Command 2: Allow RDP through Windows Firewall ───────
Enable-NetFirewallRule -DisplayGroup "Remote Desktop"
# This opens TCP port 3389 for inbound RDP connections [web:191]
# ─── Command 3: Require Network Level Authentication ─────
Set-ItemProperty -Path `
'HKLM:\SYSTEM\CurrentControlSet\Control\Terminal Server\WinStations\RDP-Tcp' `
-Name "UserAuthentication" -Value 1
# Value 1 = NLA required (more secure) [web:188][web:191]
# ─── Verify RDP is enabled ───────────────────────────────
Get-ItemProperty -Path 'HKLM:\System\CurrentControlSet\Control\Terminal Server' `
-Name "fDenyTSConnections"
# Expected: fDenyTSConnections = 0
# ─── Add a user to Remote Desktop Users group ─────────────
Add-LocalGroupMember -Group "Remote Desktop Users" -Member "DOMAIN\Interns"
# ─── Disable RDP when done ────────────────────────────────
Set-ItemProperty -Path 'HKLM:\System\CurrentControlSet\Control\Terminal Server' `
-Name "fDenyTSConnections" -Value 1
Disable-NetFirewallRule -DisplayGroup "Remote Desktop"
Method C: Enable RDP Remotely via Server Manager
Use this method to enable RDP on a remote machine (like Server Core) without logging into it directly:
Step 1: Add the Remote Server to Server Manager
Server Manager → All Servers → right-click → Add Servers
Type server name → Search → move to selected list → OK
Step 2: Open Remote PowerShell Session on That Server
Server Manager → All Servers → right-click target server
→ Windows PowerShell
A PowerShell session opens on the remote machine — not your local DC.
Step 3: Run the Three RDP Commands on the Remote Server
Paste the same three commands from Method B into this remote PowerShell session:
# Run on the REMOTE server via Server Manager PowerShell
Set-ItemProperty -Path 'HKLM:\System\CurrentControlSet\Control\Terminal Server' `
-Name "fDenyTSConnections" -Value 0
Enable-NetFirewallRule -DisplayGroup "Remote Desktop"
Set-ItemProperty -Path `
'HKLM:\SYSTEM\CurrentControlSet\Control\Terminal Server\WinStations\RDP-Tcp' `
-Name "UserAuthentication" -Value 1
Step 4: Test RDP Connection from Windows 10/11 Client
Start menu → search: Remote Desktop Connection → Open
Computer: type server name OR IP address
Click Connect → Enter administrator credentials → OK
Step 5: Disconnect Gracefully
Start button → Power button → Disconnect
⚠️ Critical Note for Server Core: Server Core has no GUI shutdown button. To release your RDS license back to the pool, always disconnect gracefully using the
logoffcommand at the terminal prompt. Abandoned sessions consume Terminal Services licenses until manually released.
# Disconnect gracefully from Server Core session
logoff
Task 4 — Enable PowerShell Remote Management (WinRM)
🎯 Your Challenge
Configure Windows Remote Management (WinRM) on both your DC1 and your second server so you can open a full interactive PowerShell session between them. Test the session by running commands remotely using Enter-PSSession.
📋 Step-by-Step Instructions
Step 1: Open PowerShell as Administrator on DC1
Start → Windows PowerShell → right-click → Run as administrator
Step 2: Set WinRM Service to Start Automatically
Run this command on every machine you want to remote-manage:
# Configure WinRM service to auto-start
Set-Service WinRM -StartupType Automatic
# Start the service immediately
Start-Service WinRM
# Verify it's running
Get-Service WinRM
# Expected: Status = Running | StartType = Automatic
Step 3: Enable PowerShell Remoting
# Enable all PowerShell remoting in one command
# -Force skips confirmation prompts [file:170]
Enable-PSRemoting -Force
This single command does the following automatically:
- Starts the WinRM service
- Sets WinRM to auto-start
- Creates an HTTP listener on port 5985 (HTTP) and optionally 5986 (HTTPS)
- Adds firewall exceptions for WinRM traffic
- Configures the machine as a PS remoting target
Step 4: Repeat on Your Second Server
Go to your second server (Data Center / File Server VM) and run the same commands:
Set-Service WinRM -StartupType Automatic
Start-Service WinRM
Enable-PSRemoting -Force
Step 5: Test Remote PowerShell Session from DC1
Back on DC1:
# Open interactive remote session
Enter-PSSession `
-ComputerName DataCenter `
-Port 5985 `
-Credential US\Administrator
# After entering password, your prompt changes to:
# [DataCenter]: PS C:\Users\Administrator\Documents>
# ← You are now running commands ON the remote machine
# Test: check remote machine's hostname
hostname
# Test: check running services on remote machine
Get-Service | Where-Object Status -eq "Running" | Select Name, Status
# Test: check disk space on remote machine
Get-PSDrive C | Select Used, Free
# Exit the remote session
Exit-PSSession
One-Time Remote Command (Without Interactive Session):
# Run a single command on a remote machine without opening a session
Invoke-Command -ComputerName DataCenter -Credential US\Administrator `
-ScriptBlock { Get-EventLog -LogName System -EntryType Error -Newest 5 }
# Run on multiple machines simultaneously
Invoke-Command -ComputerName DC1, DataCenter, FileServer `
-ScriptBlock { hostname; Get-Date }
💡 Port Reference: WinRM uses port 5985 (HTTP) by default in workgroup/domain environments. Port 5986 is used for HTTPS-encrypted remoting. For production, always use HTTPS remoting with a valid certificate to prevent credential interception.
🔐 2026 Update: In Windows Server 2025 environments, consider using SSH-based PowerShell remoting (
Enter-PSSession -HostName server -UserName admin) as a modern alternative to WinRM. SSH-based remoting works cross-platform (Linux, macOS, Windows) and doesn’t require WinRM configuration.
Task 5 — Configure Windows Update Settings
🎯 Your Challenge
On your Windows Server 2019/2022 DC, configure Windows Update to only run between 8:00 PM and 12:00 AM. Enable update notifications, configure bandwidth delivery optimization, and view the update history.
📋 Step-by-Step Instructions
Step 1: Open Windows Update Settings
Start → Settings → Update & Security → Windows Update
📌 Note: In Windows Server 2019/2022, Windows Update moved from Control Panel to the Settings app. Both paths are supported, but Settings is the primary interface going forward.
Step 2: Change Active Hours
Active Hours define when Windows will NOT restart for updates — protecting your users during business hours:
Windows Update → Change active hours
Start time: 8:00 AM
End time: 6:00 PM
Save
Step 3: Schedule Update Installation for Off-Hours
Advanced options → Automatic (recommended)
For scheduled maintenance windows:
# PowerShell: Configure update active hours
$regPath = "HKLM:\SOFTWARE\Microsoft\WindowsUpdate\UX\Settings"
Set-ItemProperty -Path $regPath -Name "ActiveHoursStart" -Value 8
Set-ItemProperty -Path $regPath -Name "ActiveHoursEnd" -Value 20
# View update history
Get-HotFix | Sort-Object InstalledOn -Descending | Select -First 20
# View pending updates (requires PSWindowsUpdate module)
Install-Module PSWindowsUpdate -Force -AllowClobber
Get-WindowsUpdate
# Install all available updates
Install-WindowsUpdate -AcceptAll -IgnoreReboot
Step 4: Configure Advanced Options
Advanced options settings:
✅ Receive updates for other Microsoft products — keeps Office, .NET, SQL updated
⬜ Automatically download over metered connections — disable to avoid data costs
✅ Show notification when restart is required — prevents surprise reboots
Step 5: Configure Delivery Optimization
Delivery Optimization allows servers to download updates from each other on the local network — reducing internet bandwidth usage in multi-server environments:
Windows Update → Advanced options → Delivery Optimization
Allow downloads from: ✅ PCs on my local network
⬜ PCs on the internet (disable to limit external exposure)
# PowerShell: Check delivery optimization settings
Get-DeliveryOptimizationStatus
# View download activity stats (bandwidth used, source of updates)
Get-DeliveryOptimizationLog | Select -Last 30
💡 Best Practice for 2026: In Windows Server 2025 environments, use Windows Server Update Services (WSUS) or Microsoft Endpoint Configuration Manager (MECM/SCCM) for centralized update management across your fleet. WSUS lets you approve, test, and schedule updates before they deploy — critical for preventing untested updates from breaking production servers.
Task 6 — Extend the Windows Server Evaluation Period
🎯 Your Challenge
Use slmgr /dlv to check how many rearm attempts remain on your evaluation server, then use slmgr /rearm to extend the evaluation period by 180 days. Restart and verify the new expiration date.
📋 Step-by-Step Instructions
⚠️ Lab Use Only: The
slmgr /rearmcommand is intended for legitimate lab and evaluation environments. Production servers require properly licensed Windows Server installations.
Step 1: Open PowerShell as Administrator
Start → Windows PowerShell → right-click → Run as administrator
Step 2: Check Current Activation Status
slmgr /dlv
A dialog window pops up showing:
- License Status: Notification (evaluation)
- Remaining Windows Rearm Count: number of rearms left
- Time-Based Activation Expiration: current days remaining
📌 2026 Rearm Facts by OS Version:
| Windows Version | Evaluation Period | Rearms Available | Max Total Days |
|---|---|---|---|
| Windows Server 2025 | 180 days | 1 rearm | ~360 days |
| Windows Server 2022 | 180 days | Up to 5 rearms | ~1080 days |
| Windows Server 2019 | 180 days | Up to 5 rearms | ~1080 days |
| Windows 10/11 (eval) | 90 days | 1 rearm | ~180 days |
⚠️ Windows Server 2025 Known Issue (2026): Some users have reported evaluation copies expiring prematurely around 50 days instead of the expected 180 days. If this happens, rearm immediately using
slmgr /rearmand document the anomaly with Microsoft Support.
Step 3: Rearm the Evaluation Period
slmgr /rearm
You’ll see: “Command completed successfully. Please restart the system for the changes to take effect.”
Click OK.
Step 4: Restart the Server
Restart-Computer -Confirm
Step 5: Verify the Extended Period After Restart
# Check expiration date (should now show 180 days)
slmgr /dli
# Full details including rearm count
slmgr /dlv
Expected output: Expiration reset to 180 days from today.
Step 6: Monitor Remaining Rearms
# Set up a reminder script — save as Check-EvalExpiry.ps1
$output = & cscript //Nologo C:\Windows\System32\slmgr.vbs /dli
$output | Where-Object { $_ -match "expiration|rearm|status" }
💡 Windows 10 Evaluation Extension via Registry (Advanced): For Windows 10 evaluation copies, you can edit
HKLM\SOFTWARE\Microsoft\Windows NT\CurrentVersion\SoftwareProtectionPlatform→ setSkipRearmfrom0to1. This allows up to 8 additional 30-day rearms (total ~360 days) before requiring reinstallation. This modifies the registry — create a restore point first.
# Windows 10 Registry Rearm Hack (lab/eval use only)
# STEP 1: Create restore point first
Checkpoint-Computer -Description "Before SkipRearm Edit" -RestorePointType MODIFY_SETTINGS
# STEP 2: Set SkipRearm to 1
Set-ItemProperty -Path `
"HKLM:\SOFTWARE\Microsoft\Windows NT\CurrentVersion\SoftwareProtectionPlatform" `
-Name "SkipRearm" -Value 1
# STEP 3: Rearm
slmgr /rearm
# STEP 4: Restart
Restart-Computer
Task 7 — Reset the DSRM Password Using ntdsutil
🎯 Your Challenge
Reset the Directory Services Restore Mode (DSRM) password on DC1 using the ntdsutil command-line tool. This password is needed to restore Active Directory from backup in disaster recovery scenarios — and must be documented securely.
📋 Step-by-Step Instructions
What is the DSRM Password?
The DSRM password is set when a server is first promoted to a Domain Controller. It allows an administrator to boot the DC into a special recovery mode to restore the AD database. If the original administrator leaves or the password is forgotten, ntdsutil lets you reset it — without needing the old password.
Applies to: Windows Server 2008, 2012, 2016, 2019, 2022, 2025.
🔐 Why It Matters: DSRM is the ultimate admin backdoor to your domain controller. If an attacker obtains the DSRM password on a DC, they can boot into recovery mode and extract or modify the entire AD database offline. Store the DSRM password in a privileged access workstation (PAW) vault — never in a shared password spreadsheet.
Step 1: Open Command Prompt as Administrator
Start → search: cmd → right-click → Run as administrator
Step 2: Launch ntdsutil Shell
ntdsutil
The prompt changes from C:\> to ntdsutil: — indicating you are inside the tool’s shell.
Step 3: Enter Password Reset Mode
ntdsutil: set dsrm password
Prompt changes to: Reset DSRM Administrator Password:
Step 4: Reset Password on Specific Domain Controller
Reset DSRM Administrator Password: reset password on server DC1
Replace DC1 with the actual hostname of your Domain Controller.
Step 5: Enter and Confirm New Password
Please type password for DS Restore Mode Administrator Account: [type new password]
Please confirm new password: [retype new password]
You’ll see: “Password has been set successfully.”
Complete ntdsutil Session:
C:\> ntdsutil
ntdsutil: set dsrm password
Reset DSRM Administrator Password: reset password on server DC1
    Please type password for DS Restore Mode Administrator Account: **********
    Please confirm new password: **********
    Password has been set successfully.
Reset DSRM Administrator Password: quit
ntdsutil: quit
C:\>
Step 6: Exit All Shells
Type: quit → Enter    (exits password reset mode)
Type: quit → Enter    (exits ntdsutil)
You’re returned to the standard command prompt.
⚠️ Consistency Across All DCs: If your domain has multiple Domain Controllers, run this procedure on each one with the same password. Using different DSRM passwords across DCs creates confusion and risk during disaster recovery. Consistency is mandatory.
Verify DSRM Password Works (Test in Lab):
1. Restart DC1
2. During boot, press F8 (or hold Shift+F8) for Advanced Boot Options
3. Select: Directory Services Restore Mode
4. Log in with: .\Administrator and your new DSRM password
5. If successful → confirm DSRM password is correct and documented
6. Restart normally after verification
Quick Reference Commands
| Task | Command |
|---|---|
| Create SMB share | New-SmbShare -Name "Share" -Path "C:\Folder" -FullAccess "Administrators" |
| List shares | Get-SmbShare |
| Remove share | Remove-SmbShare -Name "ShareName" -Force |
| Enable RDP | Set-ItemProperty 'HKLM:\...\Terminal Server' -Name fDenyTSConnections -Value 0 |
| Open RDP firewall | Enable-NetFirewallRule -DisplayGroup "Remote Desktop" |
| Enable WinRM | Enable-PSRemoting -Force |
| Remote PS session | Enter-PSSession -ComputerName Server -Credential DOMAIN\Admin |
| Check eval status | slmgr /dlv |
| Rearm evaluation | slmgr /rearm |
| Verify after rearm | slmgr /dli |
| Reset DSRM password | ntdsutil → set dsrm password → reset password on server DC1 |
| View installed updates | Get-HotFix | Sort InstalledOn -Descending |
| Check share ACL | Get-SmbShareAccess -Name "ShareName" |
| Check NTFS ACL | (Get-Acl "C:\Folder").Access |
🔑 Key Takeaways
- SMB Share permissions and NTFS permissions work together — when accessing a share over the network, Windows always enforces the most restrictive of the two; local access only uses NTFS permissions
- Access-Based Enumeration is a must-enable for any shared folder with multiple user groups — it prevents users from seeing folders they can’t access, reducing both confusion and information disclosure risk
- Three RDP enablement methods exist (GUI, PowerShell registry commands, Server Manager remote session) — PowerShell is the most scalable because the same three commands work on any Windows Server version and can be scripted for mass deployment
- WinRM + Enable-PSRemoting is the backbone of remote Windows administration — once configured on all servers, you can manage your entire infrastructure from a single PowerShell console using
Invoke-CommandandEnter-PSSession - The DSRM password is your last line of defense for Active Directory recovery — document it on day one, store it in a secure vault (not email, not shared drives), and keep it consistent across all Domain Controllers
- SMB in Windows Server 2025 now requires signing by default on all outbound connections — a critical security hardening change that closes credential relay attack vectors that plagued older SMB configurations
❓ Frequently Asked Questions
Q: What is the difference between Share permissions and NTFS permissions — and which one should I set? A: Share permissions control network access to the shared folder as a whole (Read, Change, Full Control), while NTFS permissions control access at the file and folder level, applying both locally and over the network. Best practice: set Share permissions to Full Control for Authenticated Users, then use NTFS permissions for granular access control. This way you only manage one permission set, and the more detailed NTFS settings always determine effective access.
Q: How do I check which user currently has a file open on a network share (file lock)? A: Use Get-SmbOpenFile to see all open files on your server’s shares, and Get-SmbSession to see active connections:
Get-SmbOpenFile | Select ClientUserName, Path, ClientComputerName
Get-SmbSession | Select ClientUserName, ClientComputerName, NumOpens
# Close a locked file if needed:
Get-SmbOpenFile | Where-Object Path -like "*report.xlsx*" | Close-SmbOpenFile -Force
Q: Can I enable RDP on Windows Server 2025 the same way as 2019? A: Yes — the same three PowerShell registry commands work on Windows Server 2012 through 2025. The underlying registry keys (fDenyTSConnections and UserAuthentication) have remained consistent. In 2025, Microsoft also supports enabling RDP via Windows Admin Center (WAC) — a modern browser-based server management tool that replaces many Server Manager functions.
Q: How many times can I rearm Windows Server 2025 evaluation in 2026? A: Windows Server 2025 allows 1 rearm using slmgr /rearm, extending the 180-day evaluation for a total of approximately 360 days. However, there is a known anomaly where some 2025 evaluation copies expire prematurely at ~50 days. If this happens, rearm immediately, document the issue, and consider using Windows Server 2022 evaluation (which allows up to 5 rearms = ~1080 days) for extended lab environments.
Q: What happens if I forget the DSRM password and don’t have ntdsutil access? A: If the DC is accessible and running normally, use ntdsutil from an elevated command prompt on the DC itself — no authentication with the DSRM password is required to change it. If the DC is offline and needs AD restoration, you would need the DSRM password to boot into Directory Services Restore Mode. Without it, the recovery path requires restoring from a known-good backup with a remembered DSRM password, or in extreme cases, seizing FSMO roles and rebuilding the DC.
Q: Is WinRM secure enough for production remote management? A: WinRM HTTP (port 5985) transmits data encrypted using Kerberos or NTLM within a domain — it is not plain text. However, for cross-domain or workgroup scenarios, use WinRM over HTTPS (port 5986) with a valid server certificate, or switch to SSH-based PowerShell remoting which uses industry-standard SSH encryption and works cross-platform.
🚀 Next Steps & Advanced Lab Challenges
You’ve completed the core Windows Server administration labs. Push further with these challenges:
Extend this lab:
- Create a DFS Namespace (Distributed File System) that maps
\\DOMAIN\Filesto multiple underlying file server shares for load balancing and failover - Configure SMB Encryption on your Data share:
Set-SmbShare -Name Data -EncryptData $true - Set up WSUS (Windows Server Update Services) on a dedicated VM and redirect your DC and client VMs to pull updates from it
- Configure WinRM over HTTPS using a self-signed certificate for secure out-of-domain management
- Create a PowerShell script that automatically rearms your evaluation servers and emails you the new expiry date
PowerShell Preview — Bulk Enable RDP on Multiple Servers:
# Enable RDP on multiple servers simultaneously
$servers = @("DC1", "FileServer", "DataCenter")
Invoke-Command -ComputerName $servers -ScriptBlock {
Set-ItemProperty -Path 'HKLM:\System\CurrentControlSet\Control\Terminal Server' `
-Name "fDenyTSConnections" -Value 0
Enable-NetFirewallRule -DisplayGroup "Remote Desktop"
Set-ItemProperty -Path `
'HKLM:\SYSTEM\CurrentControlSet\Control\Terminal Server\WinStations\RDP-Tcp' `
-Name "UserAuthentication" -Value 1
Write-Output "$env:COMPUTERNAME - RDP enabled successfully"
}
Related labs to tackle next:
- 🗂️ Lab: Configuring DFS Namespaces and Replication
- 🔒 Lab: SMB Signing and Encryption on Windows Server 2025
- 🖥️ Lab: Windows Admin Center — Modern Server Management Without RSAT
- 📋 Lab: Group Policy Objects — Deploy Settings Across the Domain
- 🛡️ Lab: Implementing Just Enough Administration (JEA) with PowerShell
Completed all seven tasks? Share your lab setup, screenshots, or any errors you hit in the comments — troubleshooting real issues is itself the best preparation for production environments and certification exams.
Blog Category: Labs & Hands-On Projects / Windows Server Administration / IT Infrastructure 2026