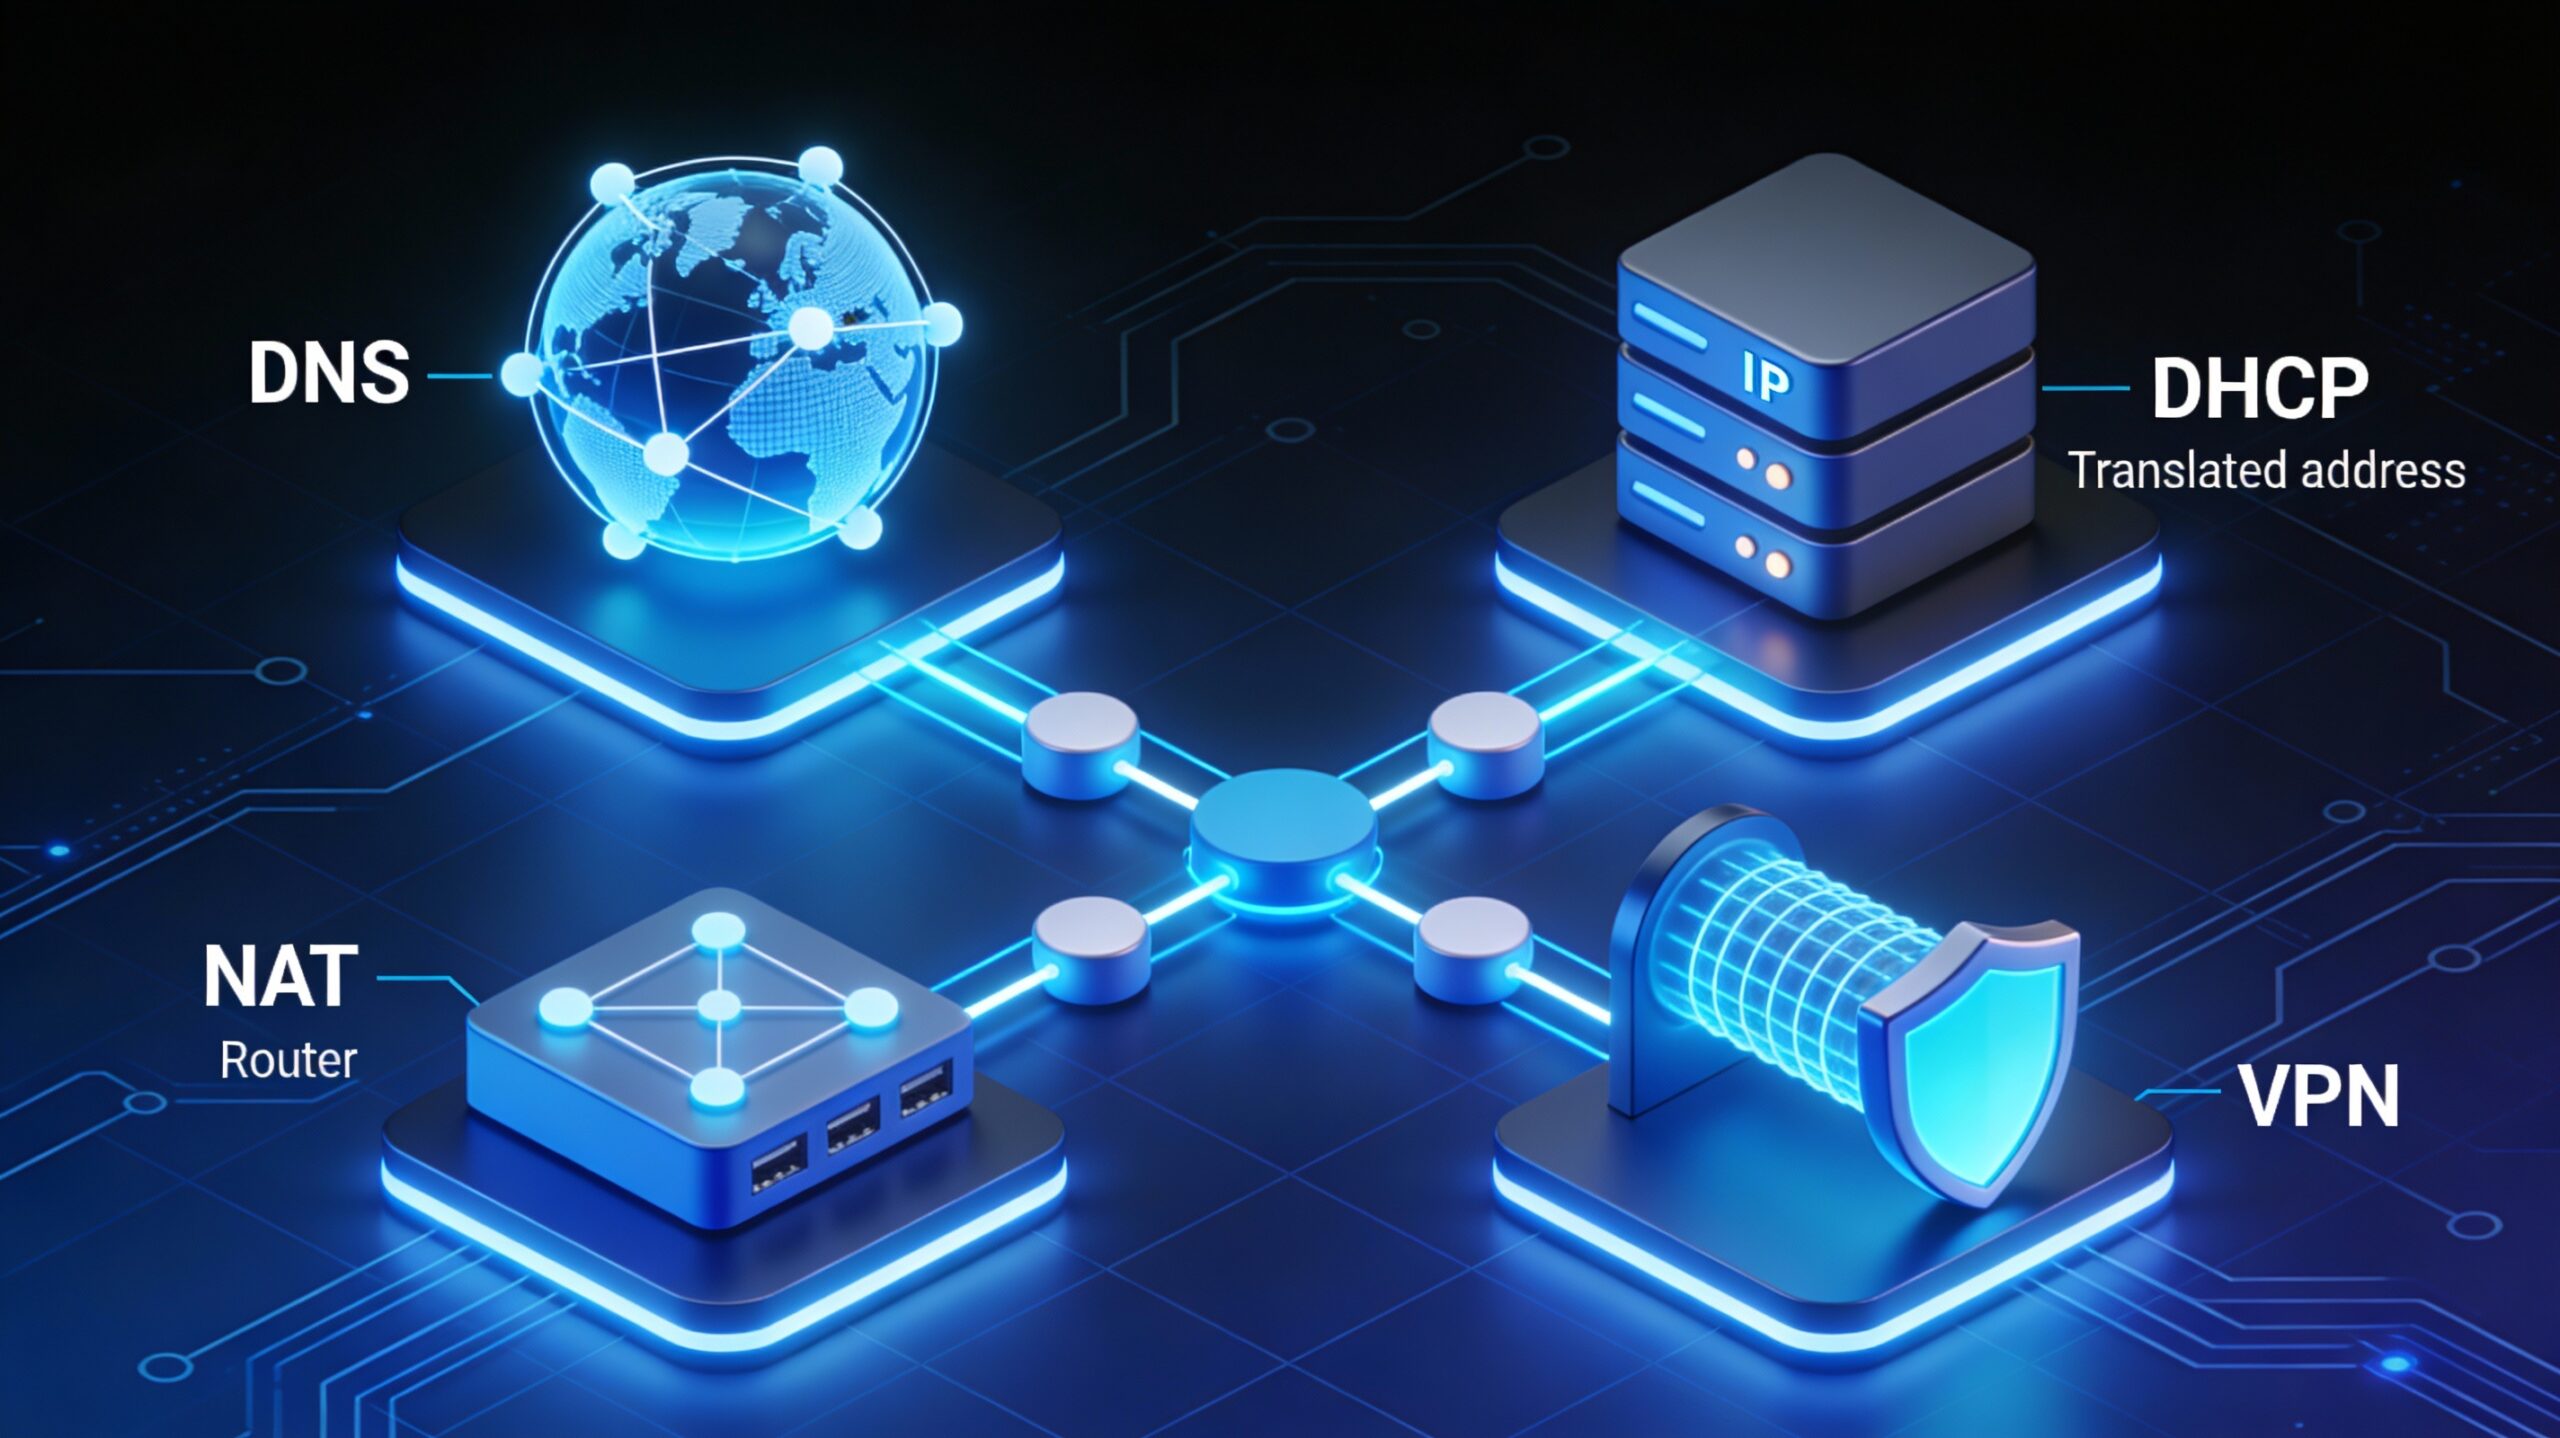
Every time you type “google.com” into your browser, a sophisticated chain of network services springs into action: DNS resolves the domain to an IP address, your computer likely received that IP configuration from DHCP, NAT translates your private IP for internet communication, and if you’re working remotely, a VPN securely tunnels your traffic to the corporate network. These five services—DNS, DHCP, NAT, VPN, and Proxies—form the backbone of modern networking.
Understanding these core services isn’t just theoretical knowledge for certifications. Following the Pareto Principle (80/20 rule), mastering these five services—which represent roughly 20% of networking concepts—will equip you to handle 80% of real-world network troubleshooting and configuration tasks in IT support, cloud engineering, and system administration roles.
Reading Time: 18 minutes
What You’ll Learn:
- How DNS translates domain names to IP addresses through hierarchical lookups
- The DHCP 4-step discovery process (DORA) for automatic IP configuration
- NAT mechanisms: one-to-many masquerading and port forwarding
- VPN tunneling concepts and virtual network interfaces
- Proxy types: forward vs reverse and their practical applications
- Troubleshooting techniques for each service
- Hands-on lab exercises to reinforce learning
Prerequisites: Basic understanding of IP addresses, subnets, and TCP/IP fundamentals.
1. DNS: Domain Name System
DNS (Domain Name System) is the internet’s phonebook, translating human-readable domain names into machine-readable IP addresses. Without DNS, you’d need to memorize that Facebook is 157.240.2.35 and Google is 142.250.185.46—an impossible task in a world with billions of websites.
Why DNS Matters
Human-friendly naming:
- Humans remember
amazon.combetter than54.239.28.85 - Marketing and branding rely on memorable domain names
- Easier to communicate and share web addresses
Infrastructure flexibility:
- Websites can change IP addresses without affecting users
- Load balancing across multiple servers using round-robin DNS
- Geographic distribution of content delivery networks (CDNs)
- Disaster recovery through DNS failover
Example scenario: When Amazon migrates servers, they update DNS records. Users continue typing amazon.com without noticing the underlying IP change.
DNS Architecture: Key Components
DNS operates through a hierarchical, distributed system with specialized roles:
1. Resolvers (DNS Clients)
- Software on your computer/device (part of operating system)
- Sends DNS queries to configured DNS servers
- Caches responses locally to reduce repeated lookups
- Typically configured automatically via DHCP
2. Recursive Name Servers (DNS Resolvers)
- Usually provided by your ISP or third-party (Google 8.8.8.8, Cloudflare 1.1.1.1)
- Perform full DNS lookups on behalf of clients
- Cache answers to improve performance and reduce load
- Handle the complexity of the recursive lookup process
3. Root Servers
- 13 authoritative root server authorities (labeled A through M)
- Deployed worldwide using anycast (same IP, multiple locations)
- Direct queries to appropriate TLD (Top-Level Domain) servers
- Managed by organizations like ICANN, Verisign, NASA
4. TLD (Top-Level Domain) Servers
- Manage specific TLDs:
.com,.org,.net,.edu,.gov, country codes (.uk,.jp) - Point to authoritative name servers for specific domains
- Example:
.comTLD server knows which servers handleexample.com
5. Authoritative Name Servers
- Hold the definitive records for a specific domain
- Owned/managed by domain owner or their hosting provider
- Contain A, AAAA, MX, CNAME, and other records
- Final source of truth for domain information
DNS Lookup Process (Step-by-Step)
Scenario: You type www.weather.com in your browser.
Step 1: Local cache check
Browser checks: "Do I already know this IP?"
OS resolver checks: "Is this in my DNS cache?"
If found and not expired (TTL valid), use cached IP. Otherwise, proceed.
Step 2: Query recursive resolver
Your PC → Recursive DNS Server (8.8.8.8)
"What's the IP address for www.weather.com?"
Step 3: Recursive resolver checks its cache
- If cached and fresh, return answer immediately
- If not cached, perform full recursive lookup
Step 4: Query root server
Recursive Server → Root Server
"Who handles .com domains?"
Root Server → Recursive Server
"Ask the .com TLD servers at [list of IPs]"
Step 5: Query TLD server
Recursive Server → .com TLD Server
"Who's authoritative for weather.com?"
TLD Server → Recursive Server
"Ask ns1.weather.com at 1.2.3.4"
Step 6: Query authoritative server
Recursive Server → ns1.weather.com
"What's the IP for www.weather.com?"
Authoritative Server → Recursive Server
"184.29.131.121, TTL: 3600 seconds"
Step 7: Return and cache
Recursive Server → Your PC
"www.weather.com is 184.29.131.121"
Both cache the result for TTL duration (1 hour in this example)
Browser connects to 184.29.131.121
Common DNS Record Types
| Record Type | Purpose | Example |
|---|---|---|
| A | Maps domain to IPv4 address | example.com → 93.184.216.34 |
| AAAA (Quad-A) | Maps domain to IPv6 address | example.com → 2606:2800:220:1:248:1893:25c8:1946 |
| CNAME | Alias one domain to another | www.example.com → example.com |
| MX | Specifies mail servers for domain | example.com → mail.example.com (priority 10) |
| TXT | Stores text information | SPF records for email authentication |
| PTR | Reverse lookup (IP to domain) | 34.216.184.93.in-addr.arpa → example.com |
| NS | Specifies authoritative name servers | example.com → ns1.example.com |
| SOA | Start of Authority (zone metadata) | Serial number, refresh intervals, TTL |
DNS Troubleshooting
Command-line tools:
Windows:
nslookup www.google.com
Expected output:
Server: dns.google
Address: 8.8.8.8
Non-authoritative answer:
Name: www.google.com
Addresses: 142.250.185.68
142.250.185.78
Advanced query (specific record type):
nslookup -type=MX gmail.com
Linux/macOS:
dig www.google.com
Expected output:
;; ANSWER SECTION:
www.google.com.    300    IN    A    142.250.185.68
Common DNS issues:
Problem: “Server not found” errors
- Check DNS server configuration:
ipconfig /all(Windows) orcat /etc/resolv.conf(Linux) - Test alternate DNS: Temporarily use 8.8.8.8 (Google) or 1.1.1.1 (Cloudflare)
- Flush DNS cache:
ipconfig /flushdns(Windows) orsudo systemd-resolve --flush-caches(Linux)
Problem: Slow website loading
- DNS resolution delay (high latency to DNS server)
- Use faster DNS providers (test with
ping 8.8.8.8vs ISP DNS) - Check TTL values (very short TTLs cause frequent lookups)
Problem: Wrong IP returned
- DNS cache poisoning (security issue)
- Propagation delay after DNS changes (can take 24-48 hours)
- Check authoritative server directly:
nslookup example.com ns1.example.com
💡 Pro Tip: When troubleshooting connectivity, always test both IP addresses (
ping 8.8.8.8) and domain names (ping google.com). If IPs work but domains fail, DNS is the culprit.
2. DHCP: Dynamic Host Configuration Protocol
DHCP (Dynamic Host Configuration Protocol) automatically assigns IP addresses and network configuration to devices, eliminating tedious manual configuration and reducing configuration errors.
Why DHCP Matters
Manual configuration problems:
- Configuring 100+ devices individually is time-consuming
- High risk of IP conflicts (two devices with same IP)
- Difficult to manage IP address assignments
- Hard to update network settings (new gateway, DNS servers)
DHCP benefits:
- ✅ Automatic configuration when devices connect
- ✅ Centralized management of IP address pools
- ✅ Prevents IP conflicts through lease tracking
- ✅ Easy to reconfigure entire networks (update DHCP server)
- ✅ Supports mobile devices joining/leaving networks
Real-world scenario: Coffee shop Wi-Fi automatically gives your phone an IP address via DHCP when you connect. No configuration required.
DHCP Discovery Process: DORA
DHCP uses a 4-step process known by the acronym DORA:
1. DISCOVER (Client broadcasts)
Client → Broadcast (255.255.255.255)
"I'm MAC address 00:1A:2B:3C:4D:5E and I need an IP address!"
Protocol: UDP
Source Port: 68 (DHCP client)
Destination Port: 67 (DHCP server)
Source IP: 0.0.0.0 (client has no IP yet)
Destination IP: 255.255.255.255 (broadcast)
2. OFFER (Server broadcasts)
DHCP Server → Broadcast (255.255.255.255)
"I offer you 192.168.1.100 with 24-hour lease"
Protocol: UDP
Source Port: 67
Destination Port: 68
Offered IP: 192.168.1.100
Subnet Mask: 255.255.255.0
Lease Duration: 86400 seconds (24 hours)
Default Gateway: 192.168.1.1
DNS Servers: 192.168.1.1, 8.8.8.8
Why broadcast? Client doesn’t have IP yet, so unicast is impossible. Broadcast ensures all devices hear the offer.
3. REQUEST (Client broadcasts)
Client → Broadcast (255.255.255.255)
"I accept the offer for 192.168.1.100"
Protocol: UDP
Source Port: 68
Destination Port: 67
Requested IP: 192.168.1.100
Why broadcast again? Multiple DHCP servers might have sent offers. Broadcasting the REQUEST tells rejected servers that their offers weren’t accepted.
4. ACKNOWLEDGE (Server broadcasts)
DHCP Server → Broadcast (255.255.255.255)
"Confirmed: 192.168.1.100 is yours for 24 hours"
Protocol: UDP
Source Port: 67
Destination Port: 68
Full Configuration:
IP Address: 192.168.1.100
Subnet Mask: 255.255.255.0
Default Gateway: 192.168.1.1
DNS Servers: 192.168.1.1, 8.8.8.8
Lease Obtained: Dec 23, 2025 11:00:00 AM
Lease Expires: Dec 24, 2025 11:00:00 AM
Client now configures its network interface with received settings.
DHCP Allocation Methods
1. Dynamic Allocation
- Server assigns any available IP from configured pool
- IP may change when lease expires and renews
- Most common for guest networks, public Wi-Fi
- Example pool: 192.168.1.100 – 192.168.1.200
2. Automatic Allocation
- Server tries to assign the same IP to the same device
- Based on MAC address tracking
- IP remains consistent across reconnections (best effort)
- Good for devices that benefit from stable IPs but don’t require guarantees
3. Fixed/Static Allocation (Reservations)
- Administrator maps specific MAC addresses to specific IPs
- Device always gets the same IP (like static IP, but centrally managed)
- Unknown MAC addresses receive no IP (security feature)
- Essential for servers, printers, network infrastructure
Example reservation:
MAC: 00:1A:2B:3C:4D:5E → IP: 192.168.1.50 (File Server)
MAC: AA:BB:CC:DD:EE:FF → IP: 192.168.1.51 (Network Printer)
DHCP Lease Management
Lease renewal process:
- At 50% of lease duration: Client attempts renewal with same DHCP server
- At 87.5% of lease: Client broadcasts renewal to any DHCP server
- If lease expires: Client must restart DISCOVER process
Viewing DHCP lease information:
Windows:
ipconfig /all
Look for:
DHCP Enabled. . . . . . . . . . . : Yes
IPv4 Address. . . . . . . . . . . : 192.168.1.100
Subnet Mask . . . . . . . . . . . : 255.255.255.0
Default Gateway . . . . . . . . . : 192.168.1.1
DHCP Server . . . . . . . . . . . : 192.168.1.1
Lease Obtained. . . . . . . . . . : Tuesday, December 23, 2025 10:00:00 AM
Lease Expires . . . . . . . . . . : Wednesday, December 24, 2025 10:00:00 AM
Manual DHCP operations:
ipconfig /release      # Release current IP back to server
ipconfig /renew        # Request new IP from DHCP server
Linux:
sudo dhclient -r       # Release
sudo dhclient          # Renew
DHCP Troubleshooting
Problem: Device gets 169.254.x.x address (APIPA)
- Cause: DHCP server unreachable
- Troubleshooting:
- Check physical connection (cable, Wi-Fi signal)
- Verify DHCP server is running
- Check if DHCP server has available IPs in pool
- Verify no firewall blocking UDP ports 67/68
Problem: IP conflict
- Cause: Two devices assigned same IP (rare with DHCP)
- Resolution:
- Release and renew:
ipconfig /release && ipconfig /renew - Check for devices with static IPs in DHCP range
- Verify DHCP server database integrity
- Release and renew:
Problem: Wrong gateway or DNS received
- Cause: DHCP server misconfiguration
- Resolution:
- Check DHCP server scope options
- Verify gateway and DNS settings in DHCP configuration
- Temporarily use static IP to test network connectivity
⚠️ Best Practice: Reserve the first 10-50 IP addresses in your subnet for static assignments (servers, network devices), and configure DHCP pool starting after this range (e.g., 192.168.1.50-254).
3. NAT: Network Address Translation
NAT (Network Address Translation) conserves scarce IPv4 addresses by allowing multiple devices on a private network to share a single public IP address. It’s the technology enabling your home network with 10+ devices to function with just one IP address from your ISP.
Why NAT Matters
IPv4 address exhaustion:
- IPv4 provides ~4.3 billion addresses (already exhausted)
- Billions of devices need internet connectivity
- NAT allows address reuse through private IP ranges
Security benefits:
- Hides internal network structure from internet
- Internal IPs not directly accessible from outside
- Acts as basic firewall (unsolicited inbound connections dropped)
Cost savings:
- ISPs charge for multiple public IPs
- Organizations save money using one public IP for many devices
One-to-Many NAT (Masquerading)
Most common NAT implementation used in home routers and corporate gateways.
How it works:
Outbound connection:
Internal Device: 192.168.1.100:54892 → Server: 93.184.216.34:80
Router NAT Table:
Internal IP:Port Public IP:Port Destination
192.168.1.100:54892 → 203.0.113.50:54892 → 93.184.216.34:80
Packet transformation:
Before NAT: Source 192.168.1.100:54892 → Dest 93.184.216.34:80
After NAT: Source 203.0.113.50:54892 → Dest 93.184.216.34:80
Return traffic:
Server responds: 93.184.216.34:80 → 203.0.113.50:54892
Router checks NAT table:
203.0.113.50:54892 → 192.168.1.100:54892
Packet transformation:
Before NAT: Source 93.184.216.34:80 → Dest 203.0.113.50:54892
After NAT: Source 93.184.216.34:80 → Dest 192.168.1.100:54892
Key mechanism: Router tracks source port to map return traffic to correct internal device.
NAT table entry lifecycle:
- Created when internal device initiates connection
- Maintained while connection active
- Timeout after inactivity (typically 5 minutes for UDP, 2 hours for TCP)
- Deleted when timeout expires
Port Forwarding (One-to-One NAT)
Problem: Masquerading NAT works for outbound connections, but how do inbound connections reach internal servers?
Solution: Port forwarding maps external ports to specific internal IP:port combinations.
Example: Hosting a web server behind NAT
Public IP: 203.0.113.50
Internal Web Server: 192.168.1.10
Port Forwarding Rule:
External Port 80 → 192.168.1.10:80
External Port 443 → 192.168.1.10:443
Traffic flow:
Internet Client: 198.51.100.42 → 203.0.113.50:80
Router applies port forwarding:
Destination changes: 203.0.113.50:80 → 192.168.1.10:80
Web server receives: Source 198.51.100.42 → Dest 192.168.1.10:80
Web server responds: Source 192.168.1.10:80 → Dest 198.51.100.42
Router applies reverse translation:
Source changes: 192.168.1.10:80 → 203.0.113.50:80
Client receives: Source 203.0.113.50:80 → Dest 198.51.100.42
Common port forwarding uses:
- Web servers (ports 80, 443)
- Game servers (various ports)
- Remote desktop (port 3389)
- Security cameras (various ports)
- FTP servers (ports 20, 21)
NAT Types and Behavior
Cone NAT:
- Once internal address:port mapped, any external host can reach it
- More permissive, better for P2P applications
- Potential security concern
Symmetric NAT:
- Different external port for each destination
- Most secure but complicates P2P applications
- Common in enterprise environments
NAT Limitations
Problems with NAT:
- ❌ Breaks end-to-end connectivity (core internet principle)
- ❌ Complicates peer-to-peer applications (gaming, VoIP)
- ❌ Difficult to host services without port forwarding
- ❌ NAT traversal techniques needed (STUN, TURN, ICE)
- ❌ Adds latency and processing overhead
Long-term solution: IPv6 adoption (128-bit addresses, virtually unlimited). With IPv6, every device gets a globally routable address, eliminating NAT necessity.
NAT Configuration Example
Home router web interface:
NAT/Port Forwarding Settings:
Service Name: Web Server
External Port: 80
Internal IP: 192.168.1.10
Internal Port: 80
Protocol: TCP
Enabled: ✓
Service Name: Minecraft Server
External Port: 25565
Internal IP: 192.168.1.15
Internal Port: 25565
Protocol: TCP/UDP
Enabled: ✓
🔒 Security Warning: Port forwarding exposes internal services to the internet. Only forward ports for services you’re actively using, ensure strong authentication, keep software updated, and consider additional firewall rules to restrict access by source IP.
4. VPN: Virtual Private Network
VPN (Virtual Private Network) extends a private network securely over public internet infrastructure, enabling remote workers to access corporate resources as if physically connected to the office LAN.
Why VPNs Matter
Remote workforce:
- Employees work from home, coffee shops, travel locations
- Need secure access to internal company resources
- Public Wi-Fi is inherently insecure
Multi-site organizations:
- Branch offices need to communicate with headquarters
- Connecting sites over dedicated lines is expensive
- VPNs leverage existing internet connections
Security requirements:
- Sensitive data must be encrypted during transmission
- Authentication ensures only authorized users connect
- Compliance regulations often mandate encrypted connections
How VPNs Work: Tunneling
Core concept: VPN creates an encrypted tunnel through public networks, encapsulating private network traffic inside.
VPN connection establishment:
Step 1: Authentication
Remote User → VPN Gateway
Credentials: username/password, certificate, or multi-factor
VPN Gateway validates authentication
Step 2: Tunnel establishment
VPN protocols negotiate encryption:
- IPsec (Internet Protocol Security)
- SSL/TLS (Secure Sockets Layer/Transport Layer Security)
- OpenVPN, WireGuard (modern alternatives)
Encryption parameters agreed:
- Cipher algorithm (AES-256, etc.)
- Key exchange method
- Authentication mechanism
Step 3: Virtual interface creation
Client creates virtual network adapter:
- Windows: "TAP-Windows Adapter"
- Linux: tun0 or tap0
- macOS: utun interface
Assigned virtual IP from remote network:
Internal IP: 10.50.1.100 (VPN-assigned)
Original IP: 192.168.1.50 (local network)
Step 4: Encapsulation
Application Layer: HTTP request to internal server
Transport Layer: TCP segment
Network Layer: IP packet (Dest: 10.0.0.5 - internal server)
VPN encrypts entire IP packet:
┌──────────────────────────────────┐
│ Encrypted Payload (Original Packet) │
└──────────────────────────────────┘
↓
Wrapped in new IP packet:
┌─────────────────────────────────────────┐
│ New IP Header │
│ Source: Public IP (Client) │
│ Dest: Public IP (VPN Gateway) │
├─────────────────────────────────────────┤
│ VPN Protocol Header (IPsec/SSL) │
├─────────────────────────────────────────┤
│ Encrypted Original IP Packet │
│ (Contains request to 10.0.0.5) │
└─────────────────────────────────────────┘
Step 5: Decapsulation at gateway
VPN Gateway receives packet:
1. Strips outer IP header
2. Processes VPN protocol header
3. Decrypts encrypted payload
4. Forwards original packet to destination (10.0.0.5)
Step 6: Return traffic
Internal server responds → VPN gateway
Gateway encrypts response
Sends through tunnel to client
Client decrypts and delivers to application
VPN Types
1. Remote Access VPN (Client-to-Site)
- Individual users connecting to corporate network
- VPN client software on user device
- Connects to VPN concentrator/gateway at office
- User receives virtual IP on corporate network
Example:
Remote Employee (Home) ←→ VPN Tunnel ←→ Corporate Network
198.51.100.42               (encrypted)      10.0.0.0/8

Virtual IP assigned: 10.50.1.100
Access to: File servers, databases, internal apps
2. Site-to-Site VPN (Site-to-Site)
- Connects entire networks (not individual users)
- Configured on routers/firewalls at each site
- Always-on connection
- Transparent to end users
Example:
Branch Office Headquarters
192.168.10.0/24 ←→ 10.0.0.0/8
Router with VPN Firewall with VPN
All traffic between networks automatically encrypted
Users access resources as if on same LAN
VPN Protocols
| Protocol | Description | Security | Speed | Use Case |
|---|---|---|---|---|
| IPsec | Industry standard, built into most OSes | Very High | Medium | Site-to-site, enterprise |
| SSL/TLS VPN | Browser-based, firewall-friendly | High | Fast | Remote access, BYOD |
| OpenVPN | Open-source, highly configurable | High | Medium | Flexible deployments |
| WireGuard | Modern, lightweight, fast | High | Very Fast | Modern implementations |
| PPTP | Legacy, outdated | Low (deprecated) | Fast | Not recommended |
VPN Configuration Example
Windows VPN client setup:
Settings → Network & Internet → VPN → Add VPN
VPN Provider: Windows (built-in)
Connection Name: Corporate VPN
Server: vpn.company.com
VPN Type: IKEv2 (or L2TP/IPsec)
Username: john.doe@company.com
Password: ********
Connect → Establishes tunnel
Virtual IP assigned: 10.50.1.100
Route table updated: 10.0.0.0/8 traffic → VPN tunnel
Verifying VPN connection:
ipconfig
Ethernet adapter Local Area Connection:
IPv4 Address. . . . . . . . . . . : 192.168.1.50
Subnet Mask . . . . . . . . . . . : 255.255.255.0
Default Gateway . . . . . . . . . : 192.168.1.1
PPP adapter Corporate VPN:
IPv4 Address. . . . . . . . . . . : 10.50.1.100
Subnet Mask . . . . . . . . . . . : 255.255.255.255
Default Gateway . . . . . . . . . : 0.0.0.0
Route table shows VPN routes:
route print
Active Routes:
Network Netmask Gateway Interface
10.0.0.0 255.0.0.0 10.50.1.100 10.50.1.100 (VPN)
0.0.0.0 0.0.0.0 192.168.1.1 192.168.1.50 (Local)
VPN Troubleshooting
Problem: VPN won’t connect
- Check internet connectivity (can’t VPN without internet)
- Verify server address correct:
ping vpn.company.com - Ensure firewall allows VPN protocols (UDP 500, 4500 for IPsec)
- Confirm credentials haven’t expired
Problem: VPN connects but can’t access resources
- Check routing:
route print(Windows) orip route(Linux) - Verify internal DNS resolution working
- Test connectivity to internal IP:
ping 10.0.0.1 - Confirm VPN gateway forwarding traffic
Problem: Slow VPN performance
- Encryption overhead adds latency
- Check internet speed (VPN can’t be faster than connection)
- Try different VPN protocol (WireGuard often faster)
- Check VPN server load (corporate gateways can be bottlenecks)
💼 Corporate Use Case: During COVID-19 pandemic, VPN usage skyrocketed. Organizations with robust VPN infrastructure maintained business continuity while employees worked remotely. Proper VPN planning is critical for modern workforce flexibility.
5. Proxies: Intermediary Services
Proxies act as intermediaries between clients and servers, providing benefits like improved performance through caching, enhanced security through content filtering, and increased privacy through anonymity.
Why Proxies Matter
Performance optimization:
- Cache frequently accessed content (websites, images, files)
- Reduce bandwidth usage (serving cached content locally)
- Faster response times for repeated requests
Security and policy enforcement:
- Block malicious websites (malware, phishing)
- Filter inappropriate content (workplace policies)
- Scan traffic for threats before reaching clients
Anonymity and privacy:
- Hide client IP addresses from destination servers
- Bypass geographic restrictions (content delivery)
- Circumvent censorship (access blocked sites)
Load balancing:
- Distribute requests across multiple backend servers
- Improve reliability and performance
- Enable horizontal scaling
Proxy Types
Forward Proxy
Direction: Client → Proxy → Internet
Purpose: Serves clients by fetching resources from servers on their behalf.
How it works:
Client → Forward Proxy → Internet Server
1. Client configured to use proxy (browser/OS settings)
2. Client sends request to proxy: "Get me http://example.com"
3. Proxy fetches content from example.com
4. Proxy returns content to client
Use cases:
Content caching:
User A requests: http://news.com/article.html
Proxy fetches from origin, caches, serves to User A
User B requests: http://news.com/article.html
Proxy serves from cache (faster, no origin request)
Access control:
Corporate proxy blocks social media:
- Facebook.com → Blocked
- Twitter.com → Blocked
- LinkedIn.com → Allowed (business use)
Anonymity:
Client IP: 192.168.1.50
Proxy IP: 203.0.113.10
Server sees request from: 203.0.113.10 (proxy)
Server doesn't know client's real IP: 192.168.1.50
Configuration example (browser):
Firefox → Settings → Network Settings → Manual Proxy
HTTP Proxy: proxy.company.com
Port: 8080
HTTPS Proxy: proxy.company.com
Port: 8080
Reverse Proxy
Direction: Internet → Reverse Proxy → Backend Servers
Purpose: Serves servers by handling client requests on their behalf.
How it works:
Client → Reverse Proxy → Multiple Backend Servers
1. Client requests: http://example.com
2. DNS resolves to reverse proxy IP
3. Proxy selects appropriate backend server
4. Proxy forwards request to backend
5. Backend responds to proxy
6. Proxy returns response to client
Use cases:
Load balancing:
Client requests → Reverse Proxy → Distributes to:
- Web Server 1 (10.0.0.11)
- Web Server 2 (10.0.0.12)
- Web Server 3 (10.0.0.13)
Proxy uses algorithm (round-robin, least connections, etc.)
SSL termination/offload:
Client → HTTPS (encrypted) → Reverse Proxy
Proxy decrypts traffic
Proxy → HTTP (unencrypted) → Backend Servers
Benefits:
- Centralized certificate management
- Reduced backend server processing
- Easier certificate renewal
Caching (CDN behavior):
Popular content cached at proxy:
- Static files (images, CSS, JavaScript)
- Frequently accessed pages
- Proxy serves cached content directly
- Backend servers handle only dynamic requests
Security:
Reverse proxy acts as barrier:
- Hides backend server IPs/architecture
- Filters malicious requests (WAF functionality)
- DDoS mitigation (absorbs attack traffic)
- Rate limiting (prevents abuse)
Popular reverse proxy software:
- Nginx: High-performance, widely used
- HAProxy: Load balancing specialist
- Apache HTTP Server: Mod_proxy module
- Cloudflare: Global CDN with reverse proxy
- AWS CloudFront: Amazon’s CDN service
Web Proxy (Squid Example)
Squid is popular open-source proxy/cache server.
Installation (Linux):
sudo apt install squid    # Debian/Ubuntu
sudo yum install squid    # RHEL/CentOS
Basic configuration (/etc/squid/squid.conf):
# Define allowed network
acl localnet src 192.168.1.0/24
# Allow access from local network
http_access allow localnet
# Default deny
http_access deny all
# Proxy port
http_port 3128
# Cache configuration
cache_dir ufs /var/spool/squid 1000 16 256
maximum_object_size 50 MB
Client configuration:
Browser proxy settings:
HTTP Proxy: 192.168.1.1
Port: 3128
Testing proxy:
curl -x http://192.168.1.1:3128 http://example.com
Monitoring:
tail -f /var/log/squid/access.log
Proxy vs VPN
| Feature | Proxy | VPN |
|---|---|---|
| Scope | Application-level (browser) | System-wide (all traffic) |
| Encryption | Optional (depends on proxy) | Always encrypted |
| Configuration | Per-application | OS-level |
| Performance | Can be faster (caching) | Overhead from encryption |
| Security | Moderate | High |
| Use Case | Web browsing, caching | Secure remote access |
🎯 Practical Tip: Use forward proxies to cache content and enforce policies in corporate environments. Use reverse proxies to load balance, secure, and optimize web applications serving external users.
Learning Strategy
Focus your study efforts on these high-impact topics:
1. DNS fundamentals
- Understand hierarchical lookup process
- Memorize common record types (A, AAAA, CNAME, MX)
- Practice
nslookupanddigcommands - Troubleshoot “can ping IP but not domain name” scenarios
2. DHCP discovery and allocation
- Master DORA process (Discover, Offer, Request, Acknowledge)
- Understand lease management and renewal
- Recognize APIPA (169.254.x.x) as DHCP failure indicator
- Configure DHCP reservations for critical devices
3. NAT concepts
- Understand one-to-many masquerading (home router behavior)
- Configure port forwarding for hosting services
- Recognize NAT as IPv4 address conservation mechanism
- Troubleshoot NAT-related connectivity issues
4. VPN basics
- Grasp tunneling and encapsulation concepts
- Understand virtual interface and IP assignment
- Differentiate remote access vs site-to-site VPNs
- Troubleshoot VPN connectivity and routing
5. Proxy roles
- Distinguish forward vs reverse proxies
- Understand caching benefits and use cases
- Recognize when proxies improve performance/security
- Configure basic browser proxy settings
Step-by-Step Learning Guide
Week 1: DNS Deep Dive
- Draw DNS hierarchy diagram (root → TLD → authoritative)
- Trace complete lookup for www.example.com on paper
- Install
Wiresharkand capture DNS queries - Practice nslookup for different record types
- Configure alternative DNS (8.8.8.8) and test performance
Week 2: DHCP Hands-On
- Install DHCP server (dnsmasq on Linux or Windows Server)
- Configure IP pool, gateway, DNS options
- Connect client devices and observe DORA with Wireshark
- Create MAC-based reservations
- Intentionally break DHCP and troubleshoot APIPA
Week 3: NAT Configuration
- Access home router configuration page
- Document current NAT table (if available)
- Set up port forwarding for web server (port 80)
- Test external access to forwarded port
- Experiment with different NAT types
Week 4: VPN Lab
- Install OpenVPN or WireGuard server
- Configure client with certificates/keys
- Establish VPN connection
- Verify virtual interface:
ipconfig/ip a - Test access to “remote” resources
- Monitor encrypted traffic with Wireshark
Week 5: Proxy Implementation
- Install Squid proxy server
- Configure clients to use proxy
- Monitor access logs for cache hits/misses
- Implement content filtering rules
- Test caching performance improvements
Week 6: Integration and Troubleshooting
- Create network topology using all services
- Simulate failures and practice systematic troubleshooting
- Use command-line tools: ping, nslookup, tracert, ipconfig
- Document troubleshooting methodology
- Build personal reference guide
Key Takeaways
🌐 DNS translates human-readable domains to IP addresses through hierarchical lookups (resolver → root → TLD → authoritative server), with caching at every level to reduce lookup times from seconds to milliseconds for repeated queries.
🔄 DHCP automates network configuration using the 4-step DORA process (Discover, Offer, Request, Acknowledge), eliminating manual IP assignment errors and enabling centralized management of thousands of devices through dynamic, automatic, or fixed allocation methods.
🔀 NAT conserves IPv4 addresses by allowing multiple private IPs to share one public IP through port tracking, while port forwarding enables hosting services behind NAT by mapping external ports to specific internal servers.
🔐 VPNs extend private networks securely over public internet through encrypted tunneling and virtual interfaces, enabling remote workers to access corporate resources as if physically connected to the office LAN with protocols like IPsec, SSL/TLS, and OpenVPN.
⚡ Proxies improve performance and security with forward proxies caching content and filtering access for clients, while reverse proxies load balance, terminate SSL, and protect backend servers from direct internet exposure.
Frequently Asked Questions
Q: What’s the difference between DNS caching and proxy caching? A: DNS caches IP addresses for domain names (lightweight, seconds/minutes lifespan). Proxy caches complete web pages, images, and files (heavyweight, hours/days lifespan). Both reduce load and improve performance, but operate at different layers.
Q: Why does DHCP use broadcast instead of unicast? A: The client requesting an IP address doesn’t have an IP yet (source 0.0.0.0), so unicast communication is impossible. Broadcasting ensures all devices hear the request, and DHCP servers respond to provide configuration.
Q: Can I use NAT with IPv6? A: IPv6 has enough addresses (340 undecillion) that NAT isn’t necessary. However, some organizations use NAT66 or NPTv6 for network renumbering or privacy reasons. It’s controversial and generally discouraged—IPv6 is designed for end-to-end connectivity.
Q: What happens if my VPN disconnects unexpectedly? A: Your traffic reverts to normal internet routing, potentially exposing sensitive data. Enable VPN kill switch functionality, which blocks all internet traffic if VPN connection drops, preventing leaks.
Q: How do I know if my company uses a proxy? A: Check browser settings (Network Settings → Proxy Configuration). If configured, you’ll see proxy server address/port. Alternatively, visit http://wpad/wpad.dat (Web Proxy Auto-Discovery) or run ipconfig /all and look for WPAD settings.
Q: Why does my website load slowly even with fast internet? A: DNS resolution delay is a common culprit. Test with nslookup and time the response. Try alternate DNS servers (8.8.8.8, 1.1.1.1). Also check if reverse proxies/CDNs are introducing latency—use tracert to see the path.
Next Steps: Building Expertise
Certifications covering these topics:
- CompTIA Network+ (N10-009): Comprehensive networking including all five services
- CompTIA Security+ (SY0-701): VPN, proxy security, DNS security (DNSSEC)
- Cisco CCNA: Advanced NAT, DHCP server configuration, DNS integration
- AWS Certified Solutions Architect: Cloud VPNs, DNS (Route 53), NAT gateways
Related Topics:
- “DNS Security Explained: DNSSEC, DNS over HTTPS (DoH), and DNS over TLS (DoT)”
- “Advanced NAT: CGNAT, NAT64, and IPv6 Transition Mechanisms”
- “Enterprise VPN Architectures: Always-On VPN, Split Tunneling, and Zero Trust”
- “Reverse Proxy Deep Dive: Nginx Configuration, SSL Termination, and Load Balancing”
- “DHCP Snooping and IPSG: Preventing DHCP-Based Attacks”
Hands-on practice platforms:
- GNS3 or Packet Tracer (network simulation)
- VirtualBox/VMware (build multi-VM lab networks)
- AWS Free Tier (practice cloud VPNs, DNS)
- Home lab (physical router/switch practice)
Have questions about configuring these services or troubleshooting network issues? Drop a comment with your specific scenario—I respond to every question and help diagnose networking problems!
Network services are the invisible infrastructure powering modern internet connectivity. Master these five essential services—DNS, DHCP, NAT, VPN, and proxies—and you’ll possess the knowledge to configure enterprise networks, troubleshoot connectivity issues, and build resilient infrastructure. Focus on the 20% that delivers 80% of real-world value, practice with hands-on labs, and watch your networking expertise grow exponentially!