Hyper-V Setup Guide: Install Windows Server 2025 & Windows 11 Virtual Machines
If you’re serious about learning Active Directory, you need a virtualization platform where mistakes don’t cost you production downtime. While VMware is popular, Hyper-V is Microsoft’s native hypervisor—blazingly fast for Windows environments, free with Windows Pro editions, and the same technology powering Azure’s infrastructure.
This hands-on tutorial walks you through enabling Hyper-V on your Windows machine and creating your first virtual machines running Windows Server 2025 and Windows 11. By the end, you’ll have a fully functional lab environment ready for Active Directory practice without spending a dime on additional software.
Reading Time: 12 minutes
What You’ll Learn:
- System requirements and Windows edition compatibility
- Enabling Hyper-V on Windows 10/11 Pro
- Creating Windows Server 2025 virtual machine with optimal settings
- Installing Windows 11 VM and resolving TPM requirements
- Understanding Generation 2 VMs and Dynamic Memory
- Troubleshooting common Hyper-V installation issues
Prerequisites: Windows 10 Pro, Windows 11 Pro, or Windows Server 2022/2025 (Home editions are NOT supported). Basic familiarity with Windows Settings and Control Panel.
Why Choose Hyper-V Over VMware or VirtualBox?
Before diving into installation, understand why Hyper-V deserves consideration for your lab environment:
Native Windows integration: Hyper-V is built directly into Windows Pro editions—no third-party downloads or installations needed. It integrates seamlessly with Windows features like networking and storage.
Performance advantages: Hyper-V typically outperforms VMware and VirtualBox when running Windows guest operating systems because it operates at the hypervisor level rather than as an application.
No guest additions required: Unlike VMware Tools or VirtualBox Guest Additions, Hyper-V Integration Services work automatically without manual installation for Windows guests.
Enterprise-ready skills: Learning Hyper-V prepares you for real-world enterprise environments where it powers production workloads, plus it’s the foundation for Microsoft Azure virtual machines.
Cost: Completely free with Windows 10/11 Pro editions—no evaluation periods or license restrictions.
💡 Pro Tip: While I recommend Hyper-V for Windows-focused labs, learn multiple platforms (Hyper-V, VMware, VirtualBox) to maximize your career flexibility. Different organizations prefer different hypervisors.
System Requirements and Compatibility Check
Windows Edition Requirements
Hyper-V is only available on Windows Pro, Enterprise, and Education editions. Windows 10 Home and Windows 11 Home do NOT support Hyper-V.
Verify your Windows edition:
- Press Windows Key + R to open Run dialog
- Type
msinfo32and press Enter - Look at System Information window
- Check OS Name line—it must say “Pro,” “Enterprise,” or “Education”
If you have a Home edition, you’ll need to upgrade to Pro or use VMware Workstation Player / VirtualBox instead.
Hardware Requirements
Minimum specifications:
- CPU: 64-bit processor with Second Level Address Translation (SLAT)
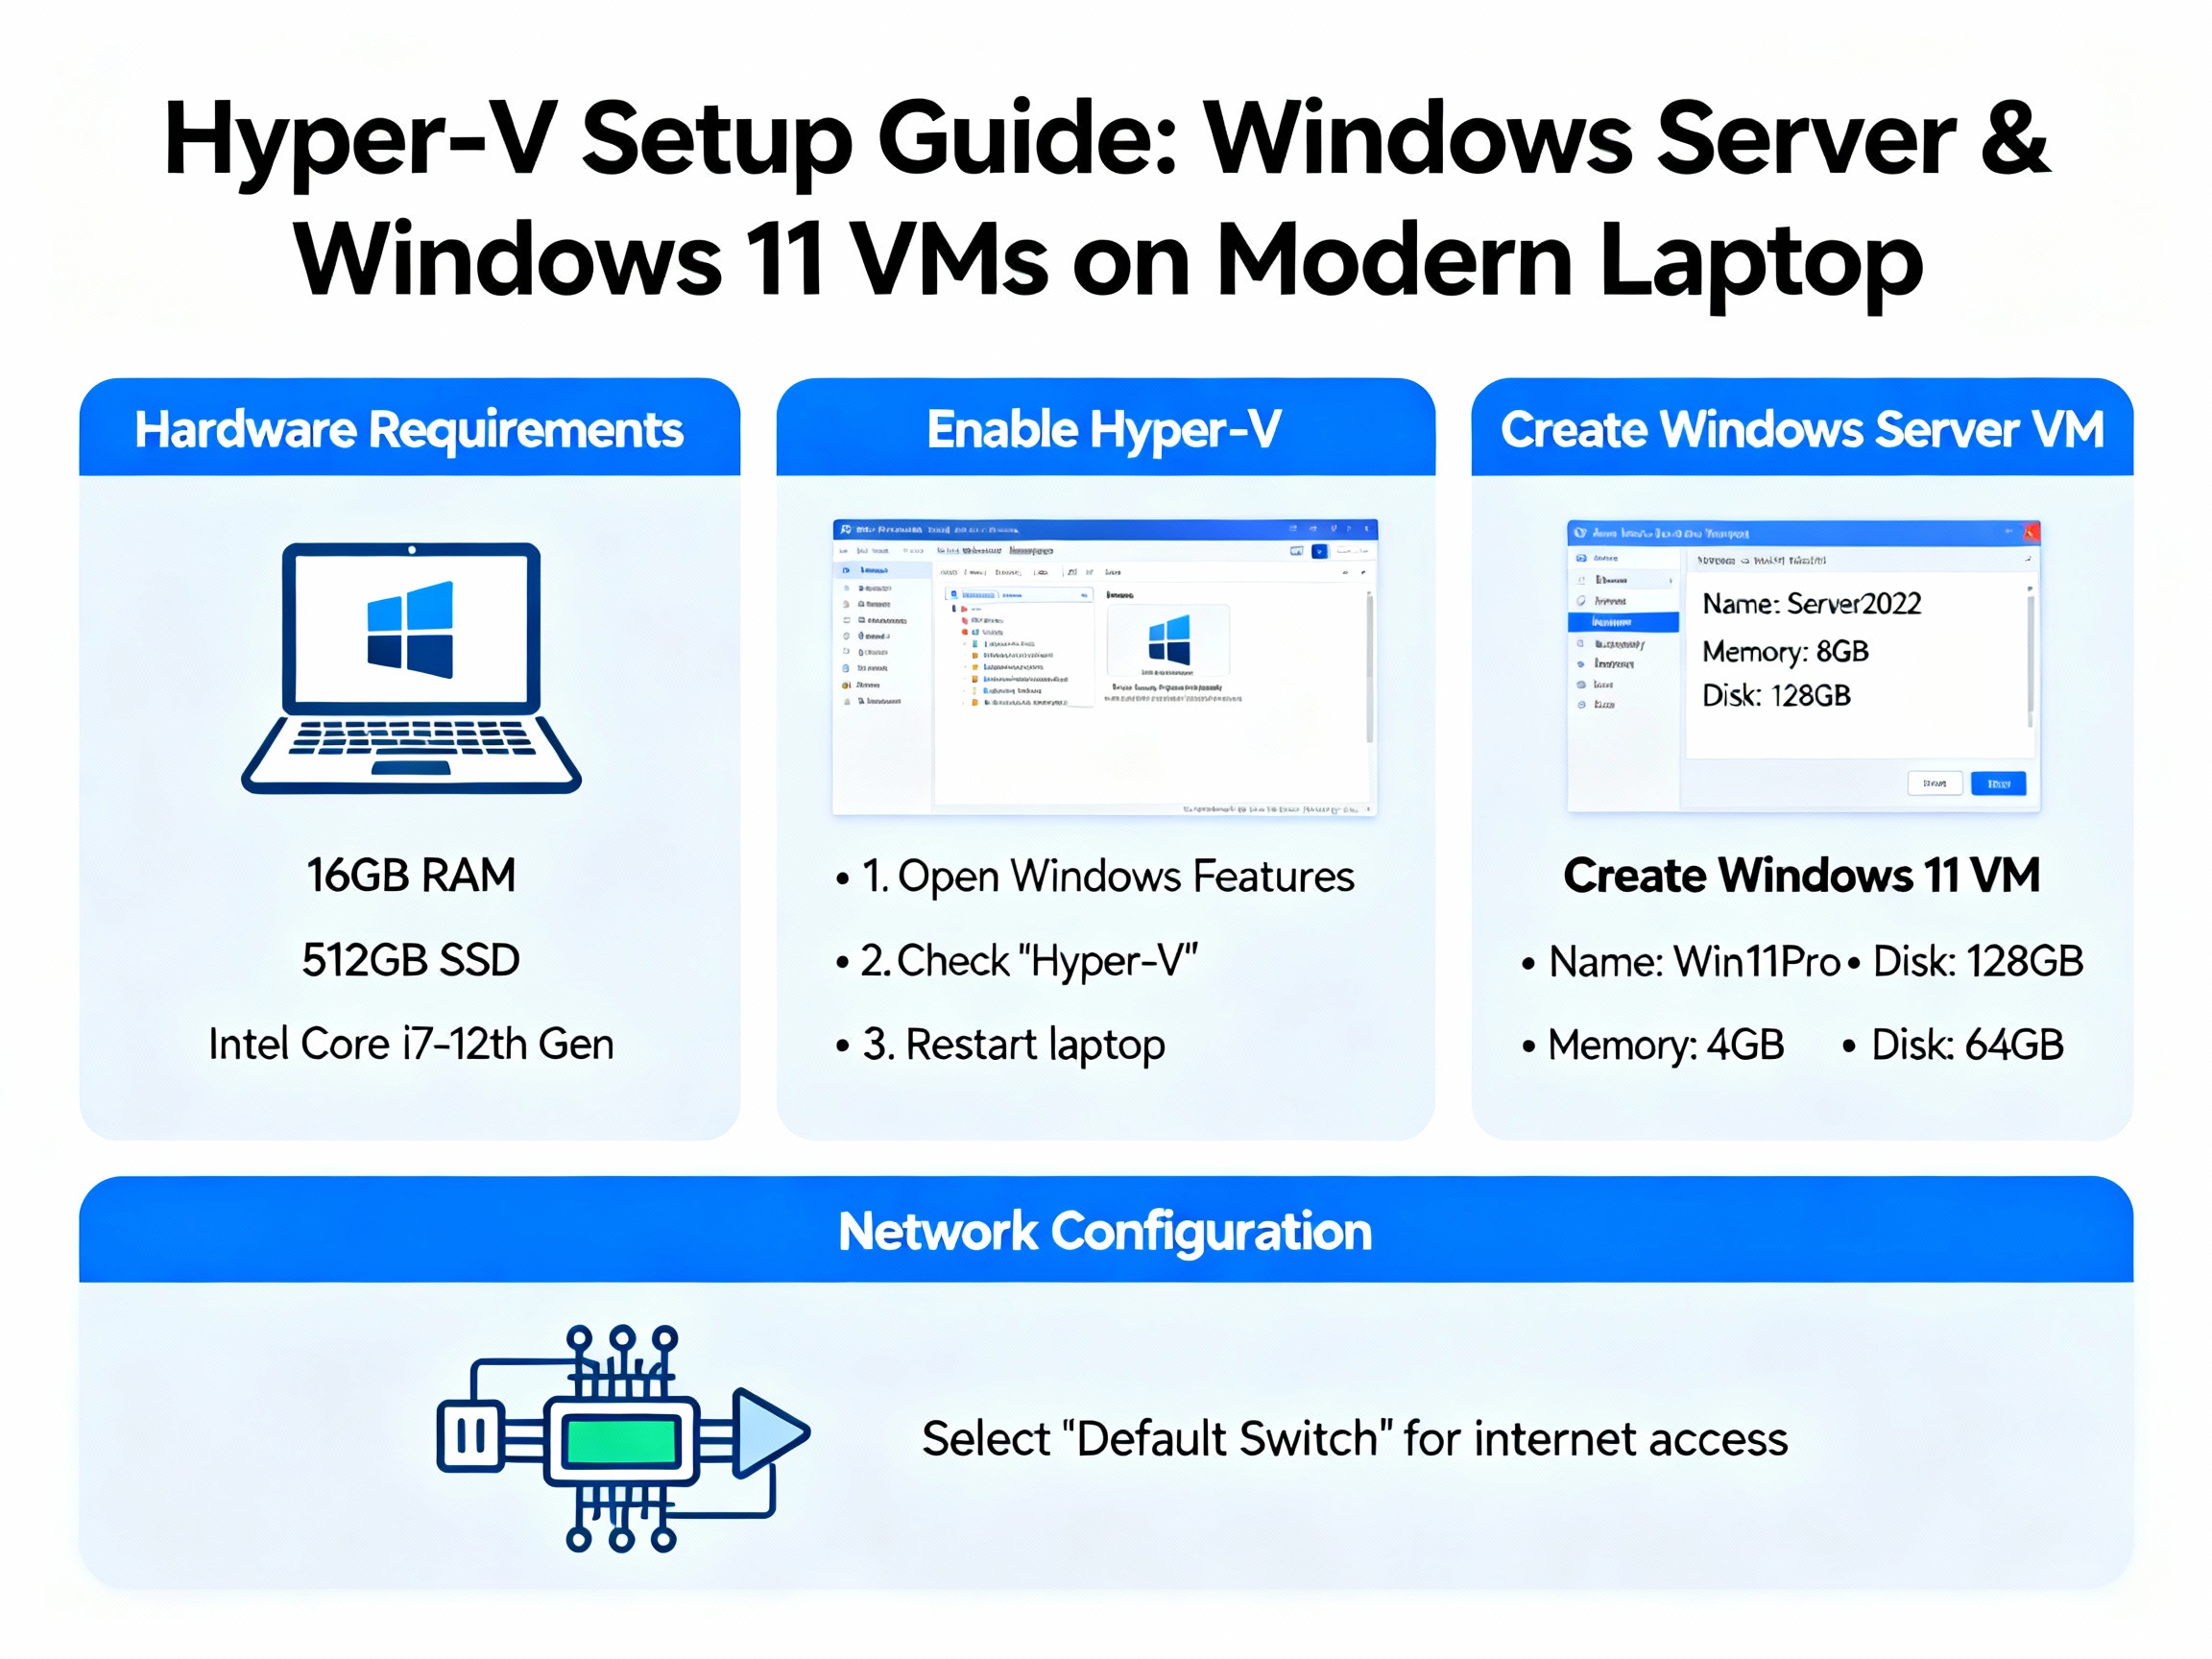
- RAM: 8GB (4GB for host OS + 4GB for one VM)
- Storage: 80GB free disk space
- Virtualization: Intel VT-x or AMD-V enabled in BIOS/UEFI
Recommended specifications:
- CPU: Quad-core or better
- RAM: 16GB+ (allows multiple VMs to run simultaneously)
- Storage: 150GB+ on SSD for better performance
- Network: Ethernet or stable Wi-Fi connection
Enable Virtualization in BIOS
Before proceeding, verify virtualization is enabled:
- Restart your computer
- Enter BIOS/UEFI (typically press F2, F10, Del, or Esc during boot)
- Navigate to CPU settings (location varies by manufacturer)
- Look for:
- Intel: “Intel Virtualization Technology” or “Intel VT-x”
- AMD: “AMD-V” or “SVM Mode”
- Enable the setting if disabled
- Save and Exit BIOS
⚠️ Critical: Without virtualization enabled, Hyper-V either won’t install or virtual machines will run extremely slowly.
Part 1: Enabling Hyper-V on Windows
Step-by-Step Installation
Method 1: Using Windows Features (GUI)
- Open Control Panel:
- Press Windows Key
- Type
Control Panel - Press Enter
- Navigate to Programs:
- Click Programs
- Click Programs and Features
- Access Windows Features:
- Click Turn Windows features on or off (left sidebar)
- Wait for the features list to load
- Enable Hyper-V:
- Scroll down and locate Hyper-V
- Check the box next to Hyper-V (this enables all sub-components)
- You’ll see two sub-items expand:
- Hyper-V Management Tools
- Hyper-V Platform
- Click OK
- Installation process:
- Windows searches for required files and installs Hyper-V
- This takes 3-5 minutes depending on your system
- Progress bar displays installation status
- Restart required:
- When prompted, click Restart now
- Your computer reboots to complete Hyper-V installation
- Save any open work before restarting
Method 2: Using PowerShell (Advanced)
For those comfortable with command-line interfaces:
- Open PowerShell as Administrator:
- Press Windows Key
- Type
PowerShell - Right-click Windows PowerShell
- Select Run as administrator
- Run installation command:
powershellEnable-WindowsOptionalFeature -Online -FeatureName Microsoft-Hyper-V -All
- Restart when prompted:
- Type
Yand press Enter to restart immediately - Or type
Nto restart manually later
- Type
Verify Hyper-V Installation
After your computer restarts:
- Open Hyper-V Manager:
- Press Windows Key
- Type
Hyper-V Manager - Click the app to launch
- Hyper-V Manager console opens:
- Left pane shows your computer name
- Center pane displays “Virtual Machines” section (empty initially)
- Right pane shows “Actions” menu
- This confirms Hyper-V is successfully installed
💡 Quick Tip: Pin Hyper-V Manager to your taskbar for easy access—you’ll use it frequently during lab work.
Part 2: Creating a Windows Server 2025 Virtual Machine
Now that Hyper-V is enabled, let’s create your first virtual machine running Windows Server 2025.
Prerequisites
Before starting, download Windows Server 2025 ISO from Microsoft Evaluation Center and note the file location.
Step-by-Step VM Creation
- Launch New Virtual Machine Wizard:
- Open Hyper-V Manager
- In the right-side Actions pane, click New > Virtual Machine
- The wizard opens
- Before You Begin:
- Review the information screen
- Click Next
- Specify Name and Location:
- Name:
W2025orWinServer2025-DC1(descriptive names help with organization) - Location: Keep default or click Browse to select a custom folder
- Best practice: Create a dedicated folder structure like
C:\VMs\Windows Server 2025\ - Click Next
- Name:
- Specify Generation:
- Assign Memory:
- Configure Networking:
- Connection: Select Default Switch from dropdown
- This provides automatic network configuration with internet access
- You can change this later for more advanced network scenarios
- Click Next
- Connect Virtual Hard Disk:
- Select Create a virtual hard disk
- Name:
W2025.vhdx(auto-filled based on VM name) - Location: Keep default or customize
- Size:
60 GB(adequate for server OS and Active Directory) - Click Next
- Installation Options:
- Select Install an operating system from a bootable image file
- Click Browse
- Navigate to your downloaded Windows Server 2025 ISO file
- Select the ISO and click Open
- Click Next
- Summary:
- Review all your configuration settings
- Click Finish to create the virtual machine
Your VM is now created but not yet started.
Installing Windows Server 2025
- Start the virtual machine:
- In Hyper-V Manager, locate W2025 in the Virtual Machines list
- Right-click W2025
- Select Connect (opens VM console window)
- In the console window, click Start
- Windows Setup begins:
- VM boots from the ISO file
- You may see “Press any key to boot from CD or DVD…”—press any key quickly
- Windows Setup loads (takes 30-60 seconds)
- Language and regional settings:
- Language to install: English (United States)
- Time and currency format: Your local setting
- Keyboard or input method: US or your layout
- Click Next
- Click Install now
- Product Key:
- Click I don’t have a product key (evaluation installations don’t require keys)
- Click Next
- Select operating system:
- License terms:
- Check I accept the Microsoft Software License Terms
- Click Next
- Installation type:
- Select Custom: Install Windows only (advanced)
- Click Next
- Disk partitioning:
- You see your 60GB unallocated drive
- Simply click Next (Windows automatically creates required partitions)
- If you see existing partitions from previous installations, delete them and use unallocated space
- Installation proceeds:
- Files copy and extract
- VM reboots automatically several times
- Total installation time: 3-5 minutes (significantly faster than traditional installations)
- Do NOT interact during reboots—let the process complete
- Set Administrator password:
- After installation completes, Windows prompts for an Administrator password
- Enter a strong password:
P@ssw0rd123or similar - Confirm the password
- Click Finish
- First login:
- Press Ctrl+Alt+End in the VM console (sends Ctrl+Alt+Delete to VM)
- Enter your Administrator password
- Press Enter
- Server Manager loads automatically
Congratulations! Windows Server 2025 is now running in your Hyper-V virtual machine.
💡 Time-Saving Tip: Once your Windows Server installation is complete and updated, create a checkpoint (snapshot) before configuring Active Directory. This allows you to revert to a clean state if needed without reinstalling.
Part 3: Creating a Windows 11 Virtual Machine
Creating a Windows 11 VM follows similar steps with one critical difference: TPM requirements.
Create the Windows 11 VM
Follow the same steps as Windows Server 2025 with these specifications:
- Name:
W11orWin11-Client1 - Generation: 2 (required for Windows 11)
- Memory: 8192 MB (8GB) with Dynamic Memory enabled
- Networking: Default Switch
- Virtual Hard Disk: 40GB (sufficient for Windows 11)
- Installation Options: Windows 11 ISO file
Click Finish to create the VM.
The TPM Requirement Problem
When you start the Windows 11 VM for the first time, installation will fail with an error message: “This PC can’t run Windows 11” because TPM (Trusted Platform Module) is not enabled.
Windows 11 requires TPM 2.0 and Secure Boot for security reasons. Hyper-V Generation 2 VMs support these features, but they’re not enabled by default.
Enable TPM for Windows 11
- Stop the VM if it’s running:
- In the VM console window, click Action > Turn Off
- Click Turn Off to confirm
- Access VM Settings:
- In Hyper-V Manager, right-click W11
- Select Settings
- Enable TPM:
- In the left navigation, click Security (under Hardware section)
- Check the box: “Enable Trusted Platform Module”
- Secure Boot should already be enabled (default for Generation 2)
- Click OK
- Restart installation:
- Right-click W11 and select Connect
- Click Start in the VM console
- Windows 11 installation now proceeds successfully
Complete Windows 11 Installation
The installation process mirrors Windows Server:
- Windows Setup: Click Next > Install now
- Product key: “I don’t have a product key”
- Select edition: Windows 11 Pro (Home edition cannot join domains)
- License terms: Accept and click Next
- Installation type: Custom
- Disk: Click Next (auto-partitions)
- Installation: Completes in 5-10 minutes with automatic reboots
- OOBE (Out of Box Experience):
- Select your region and keyboard layout
- Skip Microsoft account sign-in by selecting “Sign-in options > Domain join instead”
- Create local user account
- Configure privacy settings
Your Windows 11 VM is ready to join your Active Directory domain in future labs.
Understanding Key Hyper-V Concepts
Generation 1 vs Generation 2 VMs
Generation 1:
- BIOS-based (legacy)
- Supports older operating systems (Windows 7, Windows Server 2008)
- IDE and legacy network adapters
- Slower boot times
Generation 2:
- UEFI-based (modern)
- Supports Windows 8.1/Server 2012 and newer
- SCSI-based—faster performance
- Secure Boot and TPM support
- Faster boot times—significantly quicker than Generation 1
- Recommendation: Always use Generation 2 for Windows Server 2012+ and Windows 8.1+
⚠️ Important: You cannot change VM generation after creation. Choose carefully during the initial setup.
Dynamic Memory Explained
Dynamic Memory intelligently allocates RAM to virtual machines based on actual demand rather than reserving the full startup memory amount.
How it works:
- You allocate 8GB startup memory to a VM
- If the VM only uses 3GB, Hyper-V releases 5GB back to your host
- When the VM needs more RAM, Hyper-V automatically provides it (up to maximum memory limit)
- Multiple VMs efficiently share your physical RAM
Benefits:
- Run more VMs simultaneously on limited hardware
- Improves host system performance by not wasting unused RAM
- VMs get extra memory during peak workloads automatically
When to disable:
- Production database servers (prefer dedicated RAM)
- Performance-critical applications requiring consistent memory allocation
- SQL Server installations (Microsoft recommends disabling Dynamic Memory)
For Active Directory labs and general Windows Server testing, Dynamic Memory is ideal.
Organization Best Practices
As you build multiple VMs for your lab, organization becomes critical.
Folder Structure Recommendation
Create a logical folder hierarchy:
textC:\VMs\
├── Windows Server 2025\
│   ├── DC1\
│   ├── DC2\
│   └── Member-Server\
├── Windows 11\
│   ├── Client1\
│   └── Client2\
└── ISO Files\
    ├── WindowsServer2025.iso
    └── Windows11.iso
Naming Conventions
Use descriptive VM names that indicate purpose:
- Domain Controllers:
DC1,DC2,WS2025-DC1 - Member Servers:
FileServer1,WebServer1 - Clients:
Win11-Client1,Win10-WorkStation2 - Test environments:
Lab-DC,Test-Client
Checkpoint Strategy
Checkpoints (formerly called snapshots) save VM state at specific points:
When to create checkpoints:
- Before major configuration changes
- After clean OS installation and updates
- Before installing Active Directory
- Before Group Policy experiments
Best practice: Don’t keep more than 2-3 checkpoints per VM—they consume significant disk space.
Troubleshooting Common Issues
Hyper-V Installation Fails
Problem: Windows Features shows Hyper-V grayed out or installation fails.
Solutions:
- Verify Windows edition: Must be Pro, Enterprise, or Education (not Home)
- Check virtualization: BIOS/UEFI must have Intel VT-x or AMD-V enabled
- Update Windows: Install all Windows Updates before enabling Hyper-V
- Disable conflicting software: VMware and VirtualBox conflict with Hyper-V—uninstall them first
VM Boots to Black Screen
Problem: VM starts but displays only a black screen.
Solutions:
- Press any key quickly when you see “Press any key to boot from CD or DVD”
- Verify ISO file is attached: VM Settings > SCSI Controller > DVD Drive
- Try resetting the VM: Action menu > Reset
- Ensure ISO file is not corrupted—re-download if necessary
Windows 11 Installation Fails
Problem: “This PC can’t run Windows 11” error during installation.
Solution:
- Turn off the VM completely
- Open VM Settings > Security
- Enable “Trusted Platform Module”
- Verify “Secure Boot” is enabled
- Restart the VM and retry installation
Partition Errors During Installation
Problem: Installation fails with partition or disk errors.
Solution:
- Delete all existing partitions during disk selection
- Select unallocated space
- Click Next—Windows creates required partitions automatically
- Don’t manually create partitions unless you have specific requirements
Poor VM Performance
Problem: Virtual machines run slowly or lag significantly.
Solutions:
- Increase VM memory: 8GB minimum for servers, 4GB for clients
- Enable Dynamic Memory: Improves RAM allocation efficiency
- Use SSD storage: Dramatically improves VM disk performance
- Check host resources: Ensure host computer isn’t overloaded
- Limit running VMs: Don’t run more VMs than your RAM supports
Cannot Connect to VM Console
Problem: “Connect” option doesn’t open VM window.
Solution:
- Ensure Hyper-V Manager is running with administrative privileges
- Check Windows Firewall isn’t blocking Hyper-V
- Restart Hyper-V Virtual Machine Management service:
- Open Services (services.msc)
- Find “Hyper-V Virtual Machine Management”
- Right-click and select “Restart”
Key Configuration Reference
| Setting | Windows Server 2025 | Windows 11 |
|---|---|---|
| VM Name | W2025 or DC1 | W11 or Client1 |
| Generation | 2 (UEFI, 64-bit) | 2 (required for TPM) |
| Memory | 8GB (8192 MB) | 4-8GB (4096-8192 MB) |
| Dynamic Memory | Enabled | Enabled |
| Hard Disk | 60GB | 40GB |
| Network | Default Switch | Default Switch |
| OS Edition | Standard (Desktop Experience) | Pro (required for domain join) |
| TPM | Optional | Required (must enable) |
| Installation Time | 3-5 minutes | 5-10 minutes |
Advantages of Hyper-V for Active Directory Labs
Speed and efficiency: Hyper-V is the fastest virtualization option for Windows environments—noticeably quicker than VMware for Microsoft operating systems.
No guest tools installation: Integration Services work automatically for Windows guests without manual installation like VMware Tools or VirtualBox Guest Additions.
Enterprise relevance: Small to medium enterprises commonly use Hyper-V in production environments, making your lab experience directly transferable to workplace scenarios.
Azure preparation: Hyper-V is the foundation technology for Microsoft Azure VMs, so skills learned in Hyper-V translate directly to cloud environments.
Resource efficiency: Dynamic Memory and other Hyper-V features maximize your hardware utilization, allowing more VMs on limited resources.
Key Takeaways
🖥️ Hyper-V is Windows Pro’s native hypervisor—completely free, blazingly fast for Windows VMs, and the same technology powering Microsoft Azure infrastructure. It’s ideal for Active Directory labs and Windows-focused learning environments.
⚙️ Generation 2 VMs with Dynamic Memory provide the best performance for modern Windows operating systems. Always choose Generation 2 for Windows Server 2012+ and Windows 8.1+, and enable Dynamic Memory to maximize hardware efficiency.
🔐 Windows 11 requires TPM and Secure Boot in virtual machines—don’t forget to enable TPM in VM settings before installation, or you’ll encounter “This PC can’t run Windows 11” errors that waste troubleshooting time.
Frequently Asked Questions
Q: Can I use Hyper-V on Windows 10/11 Home edition?
A: No. Hyper-V requires Windows 10/11 Pro, Enterprise, or Education editions. Home editions don’t include Hyper-V capabilities. You’ll need to upgrade your Windows license or use VMware Workstation Player / VirtualBox instead.
Q: How much RAM do I really need for Active Directory labs?
A: Minimum 8GB physical RAM allows one domain controller (4GB) and your host OS (4GB). For comfortable multi-VM labs with domain controllers and clients, 16GB+ is strongly recommended. With 16GB, you can run 2-3 VMs simultaneously.
Q: Can I run VMware and Hyper-V on the same computer?
A: Not simultaneously. Hyper-V operates at the hypervisor level and prevents VMware and VirtualBox from functioning. You must disable Hyper-V to use other virtualization platforms. Use the command bcdedit /set hypervisorlaunchtype off and restart to disable Hyper-V.
Q: What’s the difference between checkpoints and backups?
A: Checkpoints (snapshots) save VM state at specific moments for quick rollback during testing but aren’t true backups. They depend on the parent VM files. For real backups, export entire VMs or use proper backup software that copies VM files to external storage.
Q: Will my Windows Server 2025 evaluation expire?
A: Yes, after 180 days. However, for lab purposes, simply rebuild with a fresh evaluation ISO. Your learning and practice continue indefinitely. Microsoft provides evaluation editions specifically for testing and learning scenarios.
Q: Should I use Dynamic Memory for domain controllers?
A: Yes, for labs. Dynamic Memory works well for test domain controllers. In production environments, database-heavy applications like SQL Server should use fixed memory, but Active Directory domain controllers handle Dynamic Memory without issues in most scenarios.
Next Steps: Building Your Active Directory Environment
Now that you have Windows Server 2025 and Windows 11 virtual machines running in Hyper-V, you’re ready to build your Active Directory lab infrastructure.
Coming in the next post: “Configuring Active Directory: From Installation to First Domain Controller” where we’ll cover:
- Installing Active Directory Domain Services (AD DS) role
- Promoting your server to a domain controller
- Creating your first domain and forest
- Configuring DNS integration
- Joining Windows 11 clients to your domain
Related Posts:
- “What is Active Directory? A Beginner’s Guide to AD Management”
- “Setting Up Your First Active Directory Lab with VMware” (Alternative hypervisor)
- “Active Directory Organizational Units: Structuring Your Domain”
Have questions about Hyper-V setup or encountering issues not covered here? Drop a comment below with your specific scenario—I respond to every question and frequently update posts based on reader feedback.If you’re serious about learning Active Directory, you need a virtualization platform where mistakes don’t cost you production downtime. While VMware is popular, Hyper-V is Microsoft’s native hypervisor—blazingly fast for Windows environments, free with Windows Pro editions, and the same technology powering Azure’s infrastructure.
This hands-on tutorial walks you through enabling Hyper-V on your Windows machine and creating your first virtual machines running Windows Server 2025 and Windows 11. By the end, you’ll have a fully functional lab environment ready for Active Directory practice without spending a dime on additional software.
Reading Time: 12 minutes
What You’ll Learn:
- System requirements and Windows edition compatibility
- Enabling Hyper-V on Windows 10/11 Pro
- Creating Windows Server 2025 virtual machine with optimal settings
- Installing Windows 11 VM and resolving TPM requirements
- Understanding Generation 2 VMs and Dynamic Memory
- Troubleshooting common Hyper-V installation issues
Prerequisites: Windows 10 Pro, Windows 11 Pro, or Windows Server 2022/2025 (Home editions are NOT supported). Basic familiarity with Windows Settings and Control Panel.
Why Choose Hyper-V Over VMware or VirtualBox?
Before diving into installation, understand why Hyper-V deserves consideration for your lab environment:
Native Windows integration: Hyper-V is built directly into Windows Pro editions—no third-party downloads or installations needed. It integrates seamlessly with Windows features like networking and storage.
Performance advantages: Hyper-V typically outperforms VMware and VirtualBox when running Windows guest operating systems because it operates at the hypervisor level rather than as an application.
No guest additions required: Unlike VMware Tools or VirtualBox Guest Additions, Hyper-V Integration Services work automatically without manual installation for Windows guests.
Enterprise-ready skills: Learning Hyper-V prepares you for real-world enterprise environments where it powers production workloads, plus it’s the foundation for Microsoft Azure virtual machines.
Cost: Completely free with Windows 10/11 Pro editions—no evaluation periods or license restrictions.
💡 Pro Tip: While I recommend Hyper-V for Windows-focused labs, learn multiple platforms (Hyper-V, VMware, VirtualBox) to maximize your career flexibility. Different organizations prefer different hypervisors.
System Requirements and Compatibility Check
Windows Edition Requirements
Hyper-V is only available on Windows Pro, Enterprise, and Education editions. Windows 10 Home and Windows 11 Home do NOT support Hyper-V.
Verify your Windows edition:
- Press Windows Key + R to open Run dialog
- Type
msinfo32and press Enter - Look at System Information window
- Check OS Name line—it must say “Pro,” “Enterprise,” or “Education”
If you have a Home edition, you’ll need to upgrade to Pro or use VMware Workstation Player / VirtualBox instead.
Hardware Requirements
Minimum specifications:
- CPU: 64-bit processor with Second Level Address Translation (SLAT)
- RAM: 8GB (4GB for host OS + 4GB for one VM)
- Storage: 80GB free disk space
- Virtualization: Intel VT-x or AMD-V enabled in BIOS/UEFI
Recommended specifications:
- CPU: Quad-core or better
- RAM: 16GB+ (allows multiple VMs to run simultaneously)
- Storage: 150GB+ on SSD for better performance
- Network: Ethernet or stable Wi-Fi connection
Enable Virtualization in BIOS
Before proceeding, verify virtualization is enabled:
- Restart your computer
- Enter BIOS/UEFI (typically press F2, F10, Del, or Esc during boot)
- Navigate to CPU settings (location varies by manufacturer)
- Look for:
- Intel: “Intel Virtualization Technology” or “Intel VT-x”
- AMD: “AMD-V” or “SVM Mode”
- Enable the setting if disabled
- Save and Exit BIOS
⚠️ Critical: Without virtualization enabled, Hyper-V either won’t install or virtual machines will run extremely slowly.
Part 1: Enabling Hyper-V on Windows
Step-by-Step Installation
Method 1: Using Windows Features (GUI)
- Open Control Panel:
- Press Windows Key
- Type
Control Panel - Press Enter
- Navigate to Programs:
- Click Programs
- Click Programs and Features
- Access Windows Features:
- Click Turn Windows features on or off (left sidebar)
- Wait for the features list to load
- Enable Hyper-V:
- Scroll down and locate Hyper-V
- Check the box next to Hyper-V (this enables all sub-components)
- You’ll see two sub-items expand:
- Hyper-V Management Tools
- Hyper-V Platform
- Click OK
- Installation process:
- Windows searches for required files and installs Hyper-V
- This takes 3-5 minutes depending on your system
- Progress bar displays installation status
- Restart required:
- When prompted, click Restart now
- Your computer reboots to complete Hyper-V installation
- Save any open work before restarting
Method 2: Using PowerShell (Advanced)
For those comfortable with command-line interfaces:
- Open PowerShell as Administrator:
- Press Windows Key
- Type
PowerShell - Right-click Windows PowerShell
- Select Run as administrator
- Run installation command:
powershellEnable-WindowsOptionalFeature -Online -FeatureName Microsoft-Hyper-V -All
- Restart when prompted:
- Type
Yand press Enter to restart immediately - Or type
Nto restart manually later
- Type
Verify Hyper-V Installation
After your computer restarts:
- Open Hyper-V Manager:
- Press Windows Key
- Type
Hyper-V Manager - Click the app to launch
- Hyper-V Manager console opens:
- Left pane shows your computer name
- Center pane displays “Virtual Machines” section (empty initially)
- Right pane shows “Actions” menu
- This confirms Hyper-V is successfully installed
💡 Quick Tip: Pin Hyper-V Manager to your taskbar for easy access—you’ll use it frequently during lab work.
Part 2: Creating a Windows Server 2025 Virtual Machine
Now that Hyper-V is enabled, let’s create your first virtual machine running Windows Server 2025.
Prerequisites
Before starting, download Windows Server 2025 ISO from Microsoft Evaluation Center and note the file location.
Step-by-Step VM Creation
- Launch New Virtual Machine Wizard:
- Open Hyper-V Manager
- In the right-side Actions pane, click New > Virtual Machine
- The wizard opens
- Before You Begin:
- Review the information screen
- Click Next
- Specify Name and Location:
- Name:
W2025orWinServer2025-DC1(descriptive names help with organization) - Location: Keep default or click Browse to select a custom folder
- Best practice: Create a dedicated folder structure like
C:\VMs\Windows Server 2025\ - Click Next
- Name:
- Specify Generation:
- Assign Memory:
- Configure Networking:
- Connection: Select Default Switch from dropdown
- This provides automatic network configuration with internet access
- You can change this later for more advanced network scenarios
- Click Next
- Connect Virtual Hard Disk:
- Select Create a virtual hard disk
- Name:
W2025.vhdx(auto-filled based on VM name) - Location: Keep default or customize
- Size:
60 GB(adequate for server OS and Active Directory) - Click Next
- Installation Options:
- Select Install an operating system from a bootable image file
- Click Browse
- Navigate to your downloaded Windows Server 2025 ISO file
- Select the ISO and click Open
- Click Next
- Summary:
- Review all your configuration settings
- Click Finish to create the virtual machine
Your VM is now created but not yet started.
Installing Windows Server 2025
- Start the virtual machine:
- In Hyper-V Manager, locate W2025 in the Virtual Machines list
- Right-click W2025
- Select Connect (opens VM console window)
- In the console window, click Start
- Windows Setup begins:
- VM boots from the ISO file
- You may see “Press any key to boot from CD or DVD…”—press any key quickly
- Windows Setup loads (takes 30-60 seconds)
- Language and regional settings:
- Language to install: English (United States)
- Time and currency format: Your local setting
- Keyboard or input method: US or your layout
- Click Next
- Click Install now
- Product Key:
- Click I don’t have a product key (evaluation installations don’t require keys)
- Click Next
- Select operating system:
- License terms:
- Check I accept the Microsoft Software License Terms
- Click Next
- Installation type:
- Select Custom: Install Windows only (advanced)
- Click Next
- Disk partitioning:
- You see your 60GB unallocated drive
- Simply click Next (Windows automatically creates required partitions)
- If you see existing partitions from previous installations, delete them and use unallocated space
- Installation proceeds:
- Files copy and extract
- VM reboots automatically several times
- Total installation time: 3-5 minutes (significantly faster than traditional installations)
- Do NOT interact during reboots—let the process complete
- Set Administrator password:
- After installation completes, Windows prompts for an Administrator password
- Enter a strong password:
P@ssw0rd123or similar - Confirm the password
- Click Finish
- First login:
- Press Ctrl+Alt+End in the VM console (sends Ctrl+Alt+Delete to VM)
- Enter your Administrator password
- Press Enter
- Server Manager loads automatically
Congratulations! Windows Server 2025 is now running in your Hyper-V virtual machine.
💡 Time-Saving Tip: Once your Windows Server installation is complete and updated, create a checkpoint (snapshot) before configuring Active Directory. This allows you to revert to a clean state if needed without reinstalling.
Part 3: Creating a Windows 11 Virtual Machine
Creating a Windows 11 VM follows similar steps with one critical difference: TPM requirements.
Create the Windows 11 VM
Follow the same steps as Windows Server 2025 with these specifications:
- Name:
W11orWin11-Client1 - Generation: 2 (required for Windows 11)
- Memory: 8192 MB (8GB) with Dynamic Memory enabled
- Networking: Default Switch
- Virtual Hard Disk: 40GB (sufficient for Windows 11)
- Installation Options: Windows 11 ISO file
Click Finish to create the VM.
The TPM Requirement Problem
When you start the Windows 11 VM for the first time, installation will fail with an error message: “This PC can’t run Windows 11” because TPM (Trusted Platform Module) is not enabled.
Windows 11 requires TPM 2.0 and Secure Boot for security reasons. Hyper-V Generation 2 VMs support these features, but they’re not enabled by default.
Enable TPM for Windows 11
- Stop the VM if it’s running:
- In the VM console window, click Action > Turn Off
- Click Turn Off to confirm
- Access VM Settings:
- In Hyper-V Manager, right-click W11
- Select Settings
- Enable TPM:
- In the left navigation, click Security (under Hardware section)
- Check the box: “Enable Trusted Platform Module”
- Secure Boot should already be enabled (default for Generation 2)
- Click OK
- Restart installation:
- Right-click W11 and select Connect
- Click Start in the VM console
- Windows 11 installation now proceeds successfully
Complete Windows 11 Installation
The installation process mirrors Windows Server:
- Windows Setup: Click Next > Install now
- Product key: “I don’t have a product key”
- Select edition: Windows 11 Pro (Home edition cannot join domains)
- License terms: Accept and click Next
- Installation type: Custom
- Disk: Click Next (auto-partitions)
- Installation: Completes in 5-10 minutes with automatic reboots
- OOBE (Out of Box Experience):
- Select your region and keyboard layout
- Skip Microsoft account sign-in by selecting “Sign-in options > Domain join instead”
- Create local user account
- Configure privacy settings
Your Windows 11 VM is ready to join your Active Directory domain in future labs.
Understanding Key Hyper-V Concepts
Generation 1 vs Generation 2 VMs
Generation 1:
- BIOS-based (legacy)
- Supports older operating systems (Windows 7, Windows Server 2008)
- IDE and legacy network adapters
- Slower boot times
Generation 2:
- UEFI-based (modern)
- Supports Windows 8.1/Server 2012 and newer
- SCSI-based—faster performance
- Secure Boot and TPM support
- Faster boot times—significantly quicker than Generation 1
- Recommendation: Always use Generation 2 for Windows Server 2012+ and Windows 8.1+
⚠️ Important: You cannot change VM generation after creation. Choose carefully during the initial setup.
Dynamic Memory Explained
Dynamic Memory intelligently allocates RAM to virtual machines based on actual demand rather than reserving the full startup memory amount.
How it works:
- You allocate 8GB startup memory to a VM
- If the VM only uses 3GB, Hyper-V releases 5GB back to your host
- When the VM needs more RAM, Hyper-V automatically provides it (up to maximum memory limit)
- Multiple VMs efficiently share your physical RAM
Benefits:
- Run more VMs simultaneously on limited hardware
- Improves host system performance by not wasting unused RAM
- VMs get extra memory during peak workloads automatically
When to disable:
- Production database servers (prefer dedicated RAM)
- Performance-critical applications requiring consistent memory allocation
- SQL Server installations (Microsoft recommends disabling Dynamic Memory)
For Active Directory labs and general Windows Server testing, Dynamic Memory is ideal.
Organization Best Practices
As you build multiple VMs for your lab, organization becomes critical.
Folder Structure Recommendation
Create a logical folder hierarchy:
textC:\VMs\
├── Windows Server 2025\
│   ├── DC1\
│   ├── DC2\
│   └── Member-Server\
├── Windows 11\
│   ├── Client1\
│   └── Client2\
└── ISO Files\
    ├── WindowsServer2025.iso
    └── Windows11.iso
Naming Conventions
Use descriptive VM names that indicate purpose:
- Domain Controllers:
DC1,DC2,WS2025-DC1 - Member Servers:
FileServer1,WebServer1 - Clients:
Win11-Client1,Win10-WorkStation2 - Test environments:
Lab-DC,Test-Client
Checkpoint Strategy
Checkpoints (formerly called snapshots) save VM state at specific points:
When to create checkpoints:
- Before major configuration changes
- After clean OS installation and updates
- Before installing Active Directory
- Before Group Policy experiments
Best practice: Don’t keep more than 2-3 checkpoints per VM—they consume significant disk space.
Troubleshooting Common Issues
Hyper-V Installation Fails
Problem: Windows Features shows Hyper-V grayed out or installation fails.
Solutions:
- Verify Windows edition: Must be Pro, Enterprise, or Education (not Home)
- Check virtualization: BIOS/UEFI must have Intel VT-x or AMD-V enabled
- Update Windows: Install all Windows Updates before enabling Hyper-V
- Disable conflicting software: VMware and VirtualBox conflict with Hyper-V—uninstall them first
VM Boots to Black Screen
Problem: VM starts but displays only a black screen.
Solutions:
- Press any key quickly when you see “Press any key to boot from CD or DVD”
- Verify ISO file is attached: VM Settings > SCSI Controller > DVD Drive
- Try resetting the VM: Action menu > Reset
- Ensure ISO file is not corrupted—re-download if necessary
Windows 11 Installation Fails
Problem: “This PC can’t run Windows 11” error during installation.
Solution:
- Turn off the VM completely
- Open VM Settings > Security
- Enable “Trusted Platform Module”
- Verify “Secure Boot” is enabled
- Restart the VM and retry installation
Partition Errors During Installation
Problem: Installation fails with partition or disk errors.
Solution:
- Delete all existing partitions during disk selection
- Select unallocated space
- Click Next—Windows creates required partitions automatically
- Don’t manually create partitions unless you have specific requirements
Poor VM Performance
Problem: Virtual machines run slowly or lag significantly.
Solutions:
- Increase VM memory: 8GB minimum for servers, 4GB for clients
- Enable Dynamic Memory: Improves RAM allocation efficiency
- Use SSD storage: Dramatically improves VM disk performance
- Check host resources: Ensure host computer isn’t overloaded
- Limit running VMs: Don’t run more VMs than your RAM supports
Cannot Connect to VM Console
Problem: “Connect” option doesn’t open VM window.
Solution:
- Ensure Hyper-V Manager is running with administrative privileges
- Check Windows Firewall isn’t blocking Hyper-V
- Restart Hyper-V Virtual Machine Management service:
- Open Services (services.msc)
- Find “Hyper-V Virtual Machine Management”
- Right-click and select “Restart”
Key Configuration Reference
| Setting | Windows Server 2025 | Windows 11 |
|---|---|---|
| VM Name | W2025 or DC1 | W11 or Client1 |
| Generation | 2 (UEFI, 64-bit) | 2 (required for TPM) |
| Memory | 8GB (8192 MB) | 4-8GB (4096-8192 MB) |
| Dynamic Memory | Enabled | Enabled |
| Hard Disk | 60GB | 40GB |
| Network | Default Switch | Default Switch |
| OS Edition | Standard (Desktop Experience) | Pro (required for domain join) |
| TPM | Optional | Required (must enable) |
| Installation Time | 3-5 minutes | 5-10 minutes |
Advantages of Hyper-V for Active Directory Labs
Speed and efficiency: Hyper-V is the fastest virtualization option for Windows environments—noticeably quicker than VMware for Microsoft operating systems.
No guest tools installation: Integration Services work automatically for Windows guests without manual installation like VMware Tools or VirtualBox Guest Additions.
Enterprise relevance: Small to medium enterprises commonly use Hyper-V in production environments, making your lab experience directly transferable to workplace scenarios.
Azure preparation: Hyper-V is the foundation technology for Microsoft Azure VMs, so skills learned in Hyper-V translate directly to cloud environments.
Resource efficiency: Dynamic Memory and other Hyper-V features maximize your hardware utilization, allowing more VMs on limited resources.
Key Takeaways
🖥️ Hyper-V is Windows Pro’s native hypervisor—completely free, blazingly fast for Windows VMs, and the same technology powering Microsoft Azure infrastructure. It’s ideal for Active Directory labs and Windows-focused learning environments.
⚙️ Generation 2 VMs with Dynamic Memory provide the best performance for modern Windows operating systems. Always choose Generation 2 for Windows Server 2012+ and Windows 8.1+, and enable Dynamic Memory to maximize hardware efficiency.
🔐 Windows 11 requires TPM and Secure Boot in virtual machines—don’t forget to enable TPM in VM settings before installation, or you’ll encounter “This PC can’t run Windows 11” errors that waste troubleshooting time.
Frequently Asked Questions
Q: Can I use Hyper-V on Windows 10/11 Home edition?
A: No. Hyper-V requires Windows 10/11 Pro, Enterprise, or Education editions. Home editions don’t include Hyper-V capabilities. You’ll need to upgrade your Windows license or use VMware Workstation Player / VirtualBox instead.
Q: How much RAM do I really need for Active Directory labs?
A: Minimum 8GB physical RAM allows one domain controller (4GB) and your host OS (4GB). For comfortable multi-VM labs with domain controllers and clients, 16GB+ is strongly recommended. With 16GB, you can run 2-3 VMs simultaneously.
Q: Can I run VMware and Hyper-V on the same computer?
A: Not simultaneously. Hyper-V operates at the hypervisor level and prevents VMware and VirtualBox from functioning. You must disable Hyper-V to use other virtualization platforms. Use the command bcdedit /set hypervisorlaunchtype off and restart to disable Hyper-V.
Q: What’s the difference between checkpoints and backups?
A: Checkpoints (snapshots) save VM state at specific moments for quick rollback during testing but aren’t true backups. They depend on the parent VM files. For real backups, export entire VMs or use proper backup software that copies VM files to external storage.
Q: Will my Windows Server 2025 evaluation expire?
A: Yes, after 180 days. However, for lab purposes, simply rebuild with a fresh evaluation ISO. Your learning and practice continue indefinitely. Microsoft provides evaluation editions specifically for testing and learning scenarios.
Q: Should I use Dynamic Memory for domain controllers?
A: Yes, for labs. Dynamic Memory works well for test domain controllers. In production environments, database-heavy applications like SQL Server should use fixed memory, but Active Directory domain controllers handle Dynamic Memory without issues in most scenarios.
Next Steps: Building Your Active Directory Environment
Now that you have Windows Server 2025 and Windows 11 virtual machines running in Hyper-V, you’re ready to build your Active Directory lab infrastructure.
Coming in the next post: “Configuring Active Directory: From Installation to First Domain Controller” where we’ll cover:
- Installing Active Directory Domain Services (AD DS) role
- Promoting your server to a domain controller
- Creating your first domain and forest
- Configuring DNS integration
- Joining Windows 11 clients to your domain
Related Posts:
- “What is Active Directory? A Beginner’s Guide to AD Management”
- “Setting Up Your First Active Directory Lab with VMware” (Alternative hypervisor)
- “Active Directory Organizational Units: Structuring Your Domain”
Have questions about Hyper-V setup or encountering issues not covered here? Drop a comment below with your specific scenario—I respond to every question and frequently update posts based on reader feedback.